How to Configure SLA to Work for Clients with Different Services and Service Levels in Contracts
Basic SLA Configuration
Let's configure SLA for Incident requests.
We have an output data that contains services and service levels. And we have SLA time data for requests with different levels of service.
The task is to configure Service Level Agreement for Incident Requests with different SLA limits for each service and service level according to the provided data.
Services:
- Phone
- Internet
- Wi-Fi
Service Levels:
- Platinum
- Gold
- Silver
- Bronze
Each service may be used with different service level for different customers. For example, one client uses the Phone service with Platinum level of service, the other - with Gold; Internet: Gold and Silver clients; Wi-Fi: Gold, Silver, Bronze; etc.
SLA data:
| SLA type | Platinum | Gold | Silver | Bronze |
|---|---|---|---|---|
| Reaction time | 5 min. | 15 min. | 30 min. | 1 h |
| Resolve time | 1 h | 2 h | 4 h | 8 h |
| Working hours | 24 hours | 24 hours | 24 hours | 24 hours |
In this guide we will do the most basic configurations of request type and services, and will focus more on the SLA settings.
First let's create provided services and service levels
Open the Services page, and click Create to create a new service.
The Name is the only required field for now.

The same way, we create Internet and Wi-Fi services.
Now click on Service Levels to open the Service Levels page.
Let's create service levels. Here we also fill in only the Name field.
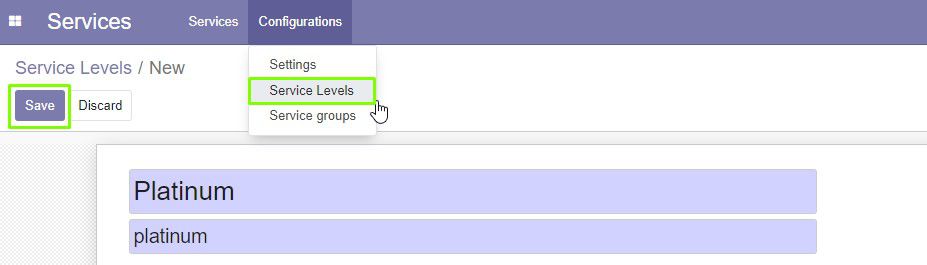
We also create Gold, Silver and Bronze levels of service.
More detailed about creation of services and service levels you can read in the Documentation.
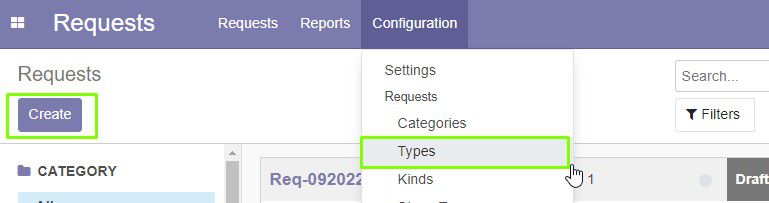
Now we configure request type for incidents
-
Open the Requests app. Under the Configuration menu, select Types. Click Create to create a new type.
-
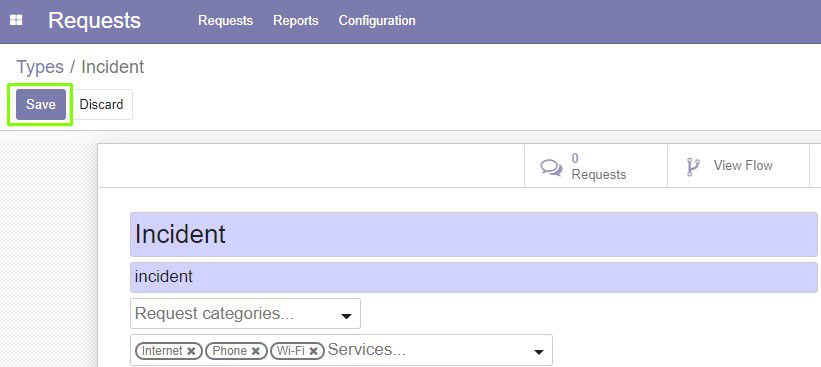
On the request type form, enter the Name of a new type.
-
In the Services field, select all the previously created services. Thus, they will be available for requests of this type.
-
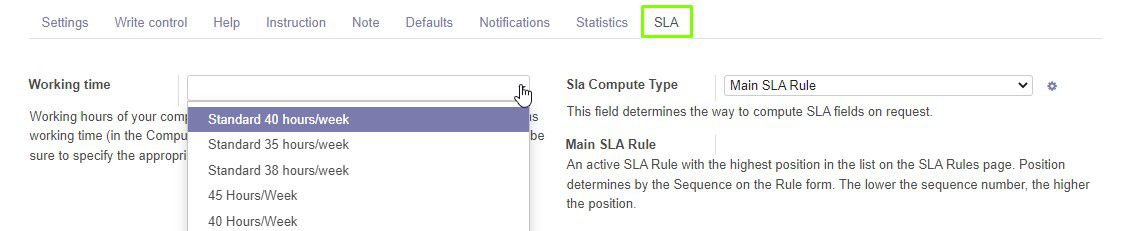
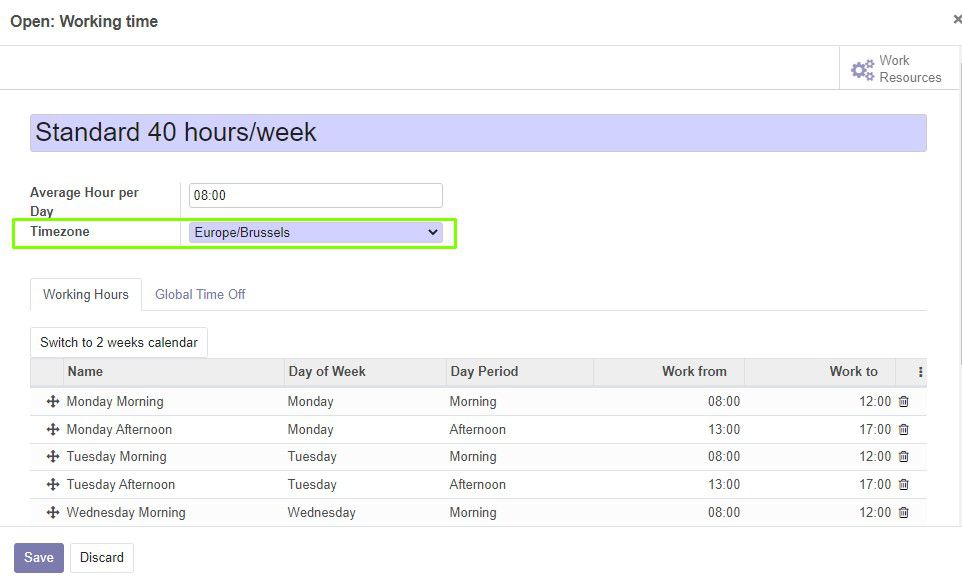
Now look at the SLA tab. Here you can set up working hours of your company. In the output data, working hours - 24h. So, we can use Absolute time to calculate SLA time (on the SLA Rule form), and we do not need to set Working time on this field.
But if we need to calculate SLA time as Working time, this field is required. We can select one of the presets or create a new one. Be sure to specify the appropriate timezone for your company on the Working Time form.
-
Click Save to save the form.
More detailed info about creation of request type you can read in the Documentation.
Configure SLA Rules
We need to create 2 SLA Rules: 1) Reaction time - time to review and assign request; 2) Resolve time - total time to resolve this incident. We will start with the configuration of SLA Rule Types - these are global types of rules (used to group SLA Rules, for example, in reporting). SLA Rule Types are required when you create SLA Rules.
Click SLA Rule Type, and then Create to create a new rule type.
Click Create and create a new SLA Rule. Enter the name of a new SLA Rule Type.

Create 2 rule types: Unassigned and Assigned.
Now we can configure Service Level Agreement rules for incident requests.
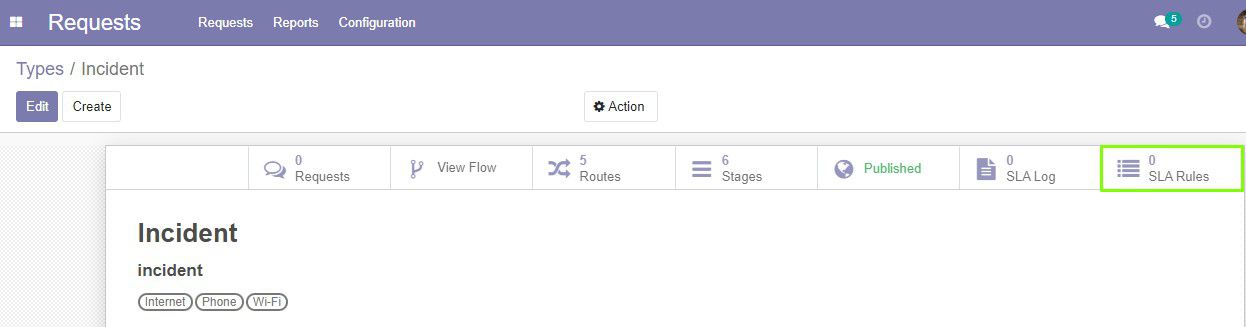
To configure SLA, click SLA Rules on the form of request type. Then click Create to create a new rule.
On the form:
-
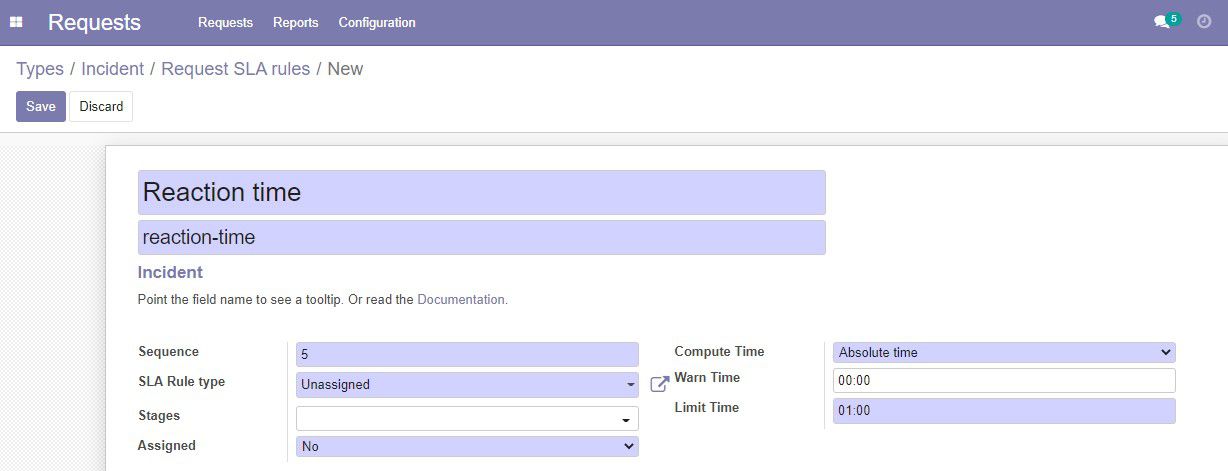
Enter the Name of the rule.
-
In the SLA Rule type field, select Unassigned.
-
In the Stages field, we need to specify all stages on which this rule will act. We can skip Stages for now (this means this SLA Rule will be used throughout all the processing period).
-
In the Assigned field, select No. That means this rule will be used when request is not assigned.
-
In the Compute time field, we use Absolute time. It is fine, as our working hours are 24/7.
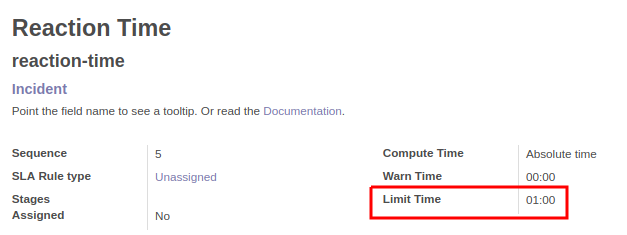
-
Limit time we set to 1 hour, it corresponds to our longest reaction time (Bronze level of service).
-
Warn Time we skip for now, it can be set later for the users need.
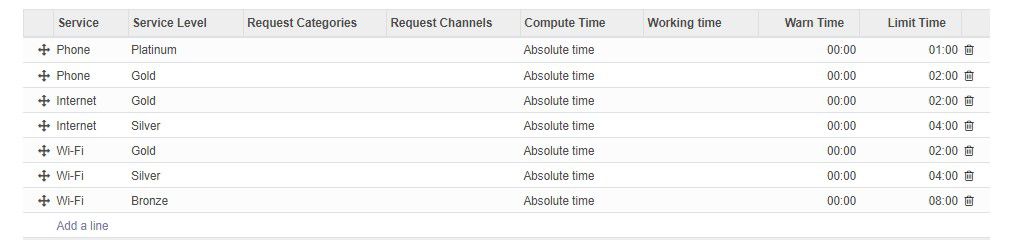
Now we set up SLA Rule lines according to output data. Lines allows to specify conditions, if all conditions in the line are met, this rule will work with time limits from the matched line.
Click Add an item and add services and service levels according to our data.

Note: If at least one of the conditions in the SLA Rule lines is not met (for example, Service is Phone, but Service Level - Bronze), this line will not pass the verification, and time limits of the main SLA rule will be used (1 hour).
We do not select categories and priority, so these lines will work for requests of all categories and priorities.
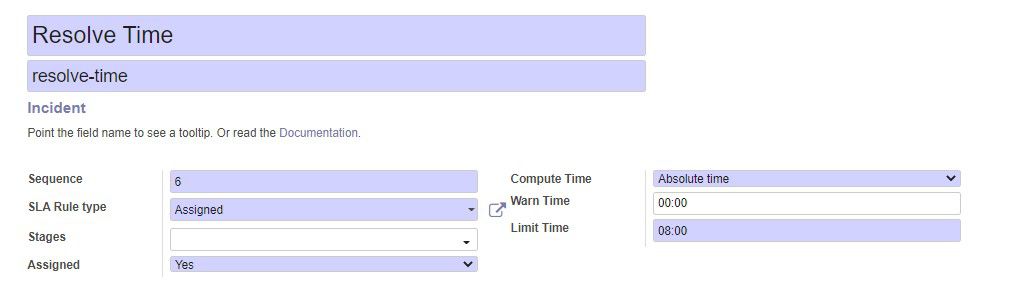
The Reaction Time SLA Rule is completed. We need to create another one, Resolve Time.
This rule will have mostly similar configurations, but with the following differences:
- In the SLA rule Type field, we select Assigned.
- In the Assigned field, select Yes. Thus, this SLA Rule will be used when request is assigned.
- We also need to change time limits according to the data.
Completed SLA Rule form should looks like the following:
Create Basic Contracts for Clients with Different Services and Service Levels
Now we will create 2 basic customer contracts without subcontracts for different partners. These contracts will include the same services, but with a different level of service.
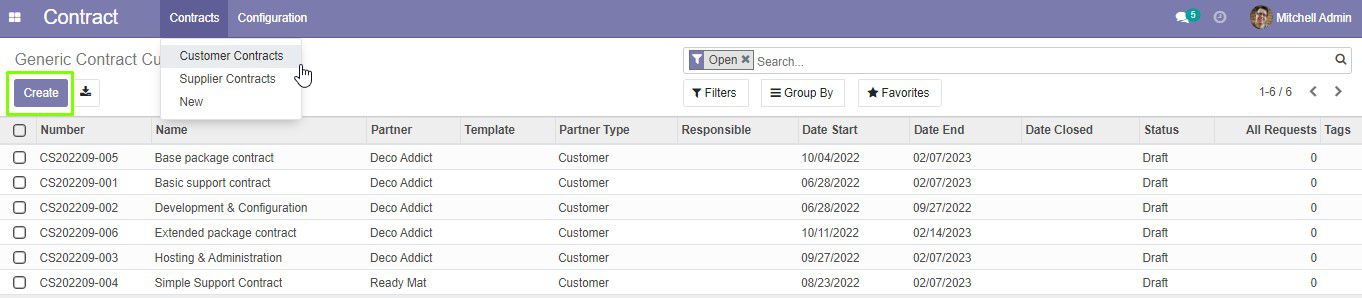
Open the Contracts app, select Customer Contracts and click Create to create a new customer contract.
On the contract form do the following:
-
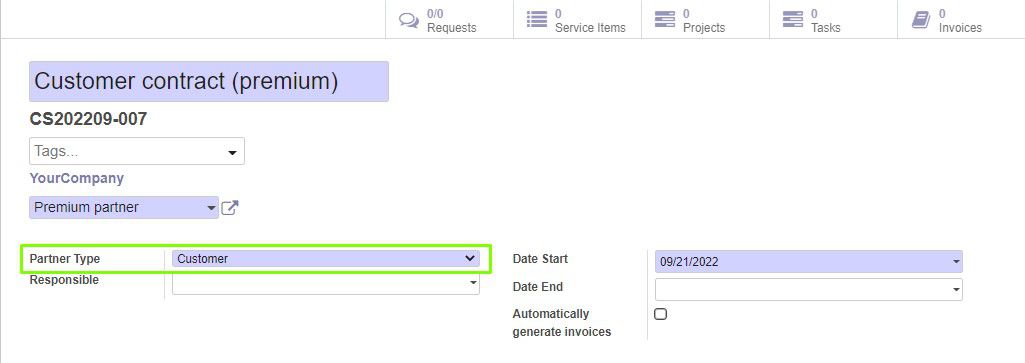
Enter the Name of the contract.
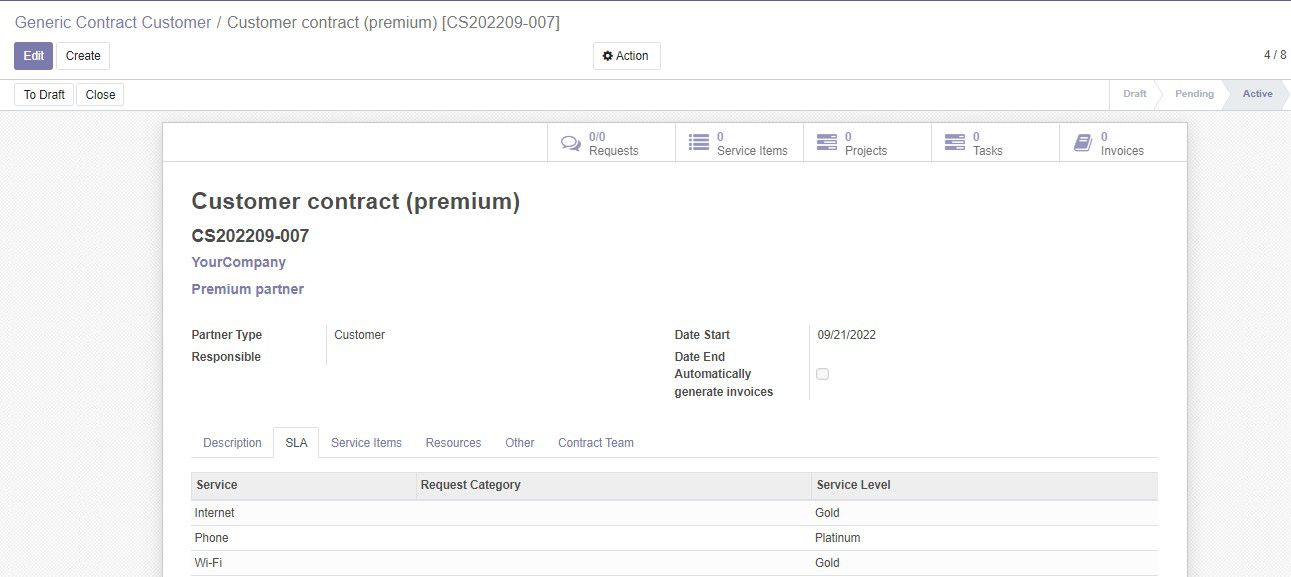
Select the partner. We created 2 demo partners - Premium Partner and Regular Partner. The current contract will be for Premium Partner.
Each partner has default level of service. You can select it on the Service Info tab of the Partner form. Default service level will be automatically used for this partner in other service-related apps, unless you manually specify another service level.
-
Partner type - Customer.
-
Specify the required Start and End dates for the contract. The looks similar to this:
Now we will add services with service levels to the contract. Open the SLA tab, and then click Add a line.

-
We add all the necessary services. For each service we indicate level of service.

-
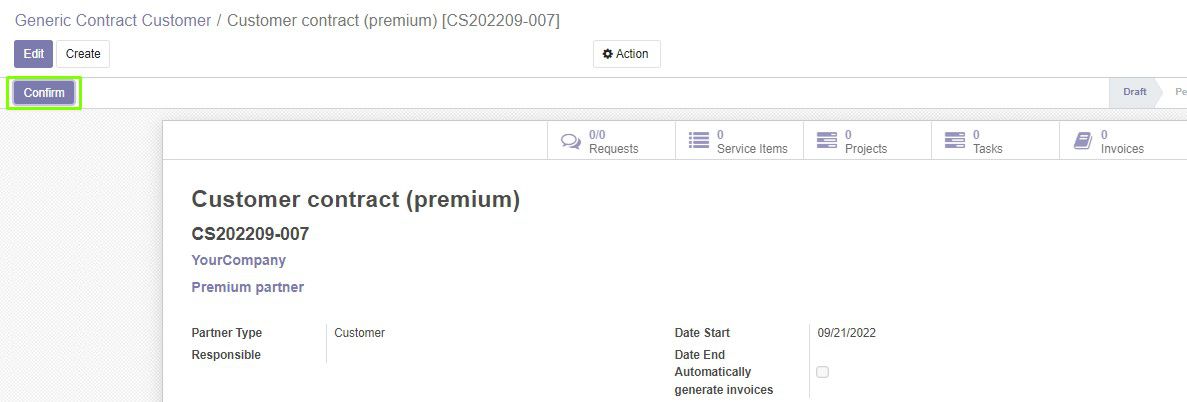
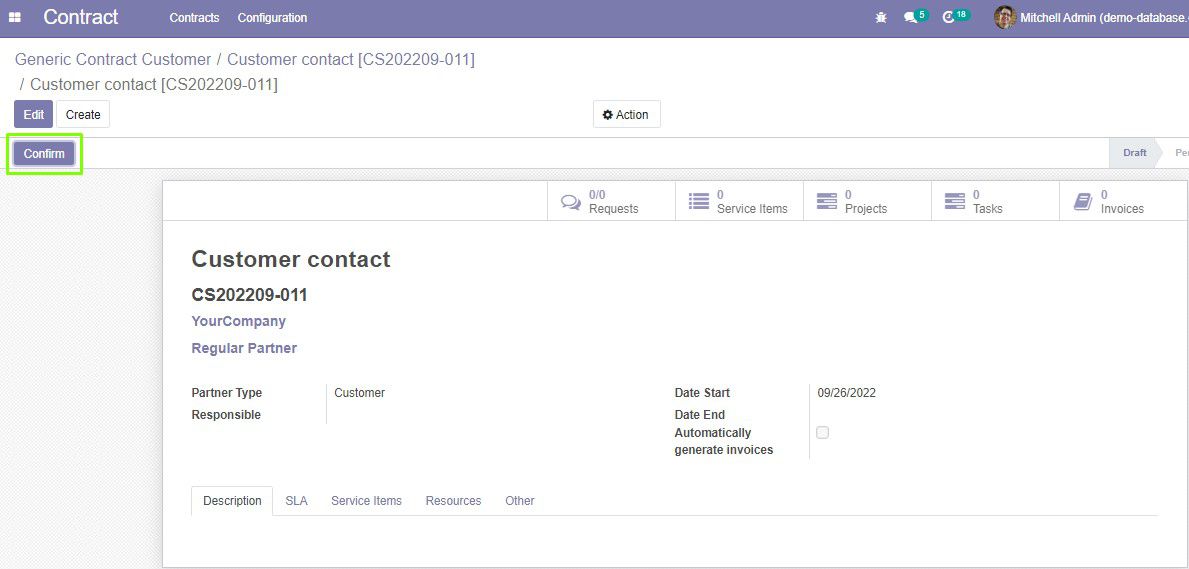
We also should confirm the current contract to activate it. Click Confirm above the form.
-
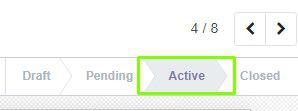
The status of the contract will change to Active.
The same way, we need to create another contract for Regular Partner. The default level of service for Regular Partner is Silver. But we will specify different levels of service for each service in the contract lines.
The form of a new contract looks like the following:
Do not forget to Confirm the contract to activate it.
Let's Test Configured SLA
Now that our contracts are configured and activated, each of our customers can create an Incident request, and we will see how the SLA will work for them.
We will create requests from the internal interface, just to see how the SLA works. If you need info about how to submit requests from the website, please read the Website Service Desk user's guide.
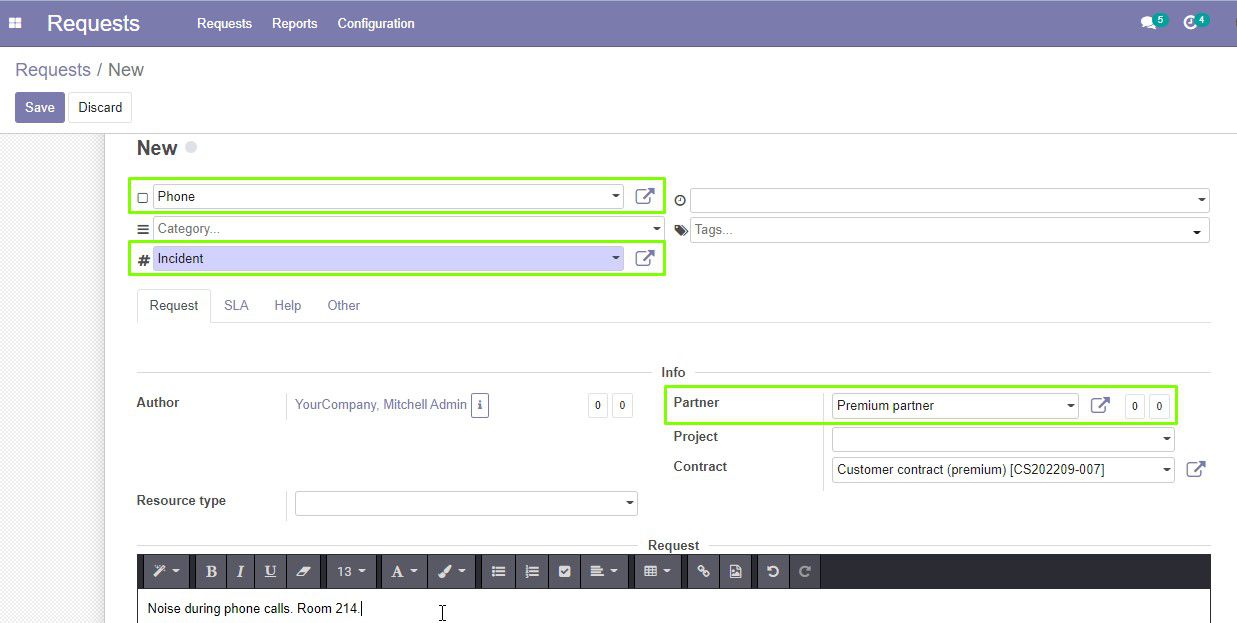
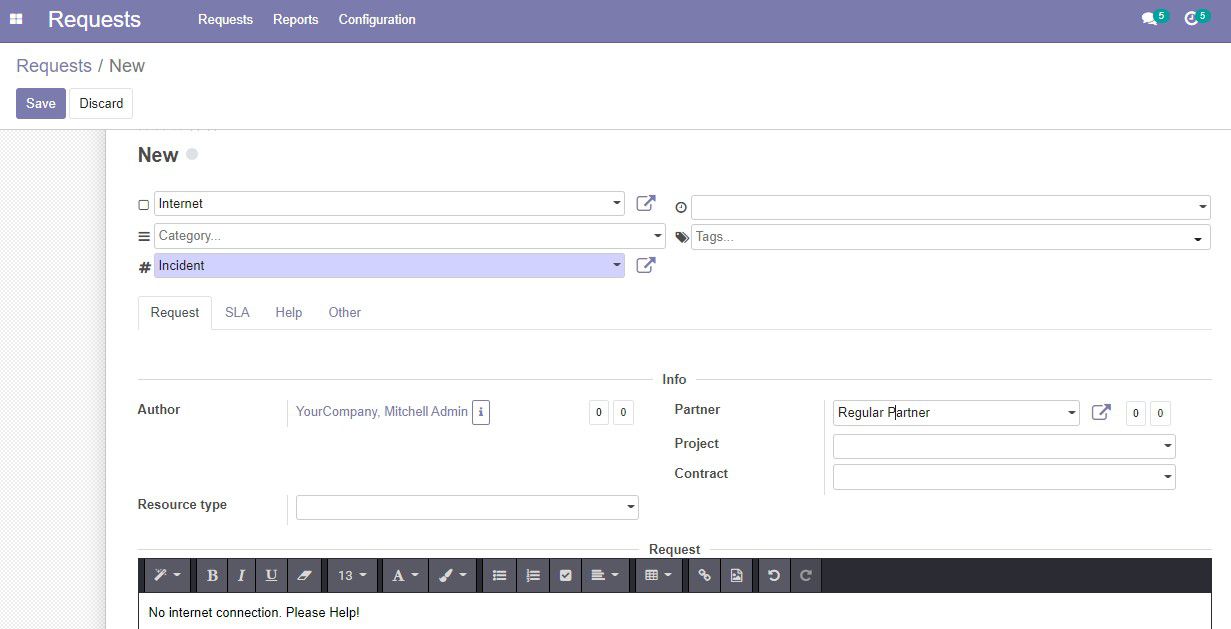
Open the Requests app. Click Create to create a new request.

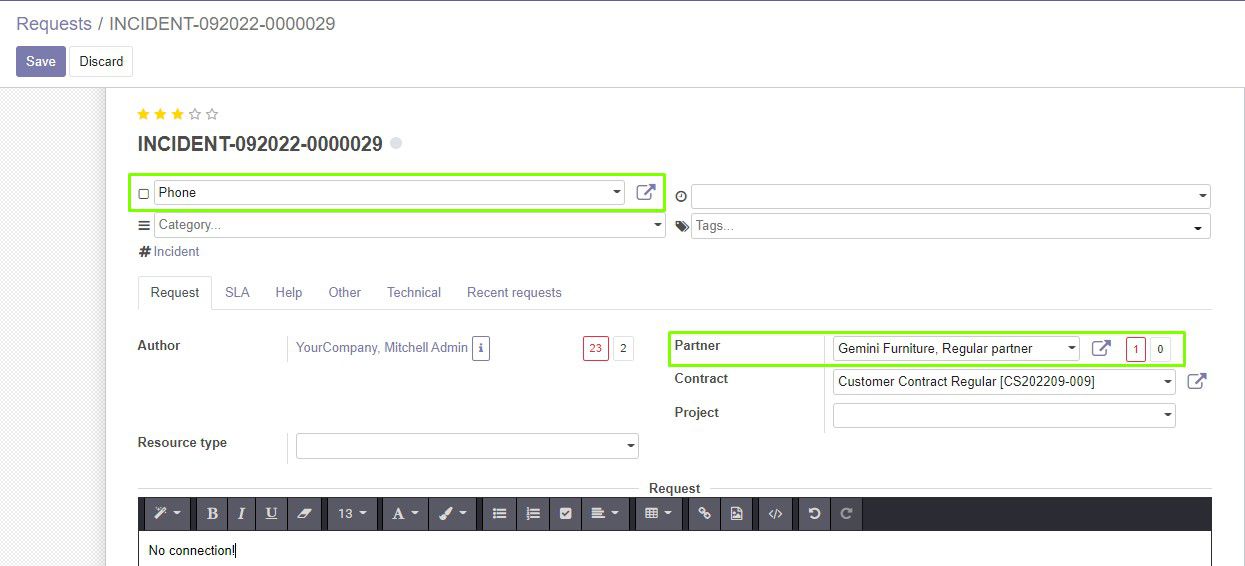
Let's create the first incident from our Premium Partner. The company will report about noise during phone calls.
On the request form, do the following steps:
-
Select the Service for this request - Phone.
-
Select the request Type - Incident.
-
Specify related partner in the Partner field - Premium Partner.
-
In the text field below, provide the description of the problem.
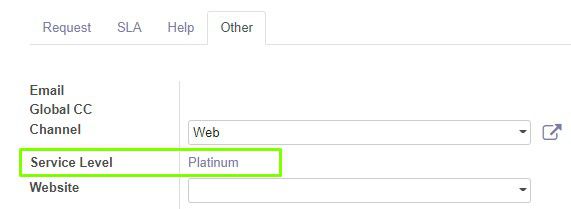
-
If you look at the Other tab of the form, you can see the Service Level field. It was automatically filled in with partner's default level of service.
-
Save the request. It will be automatically submitted.
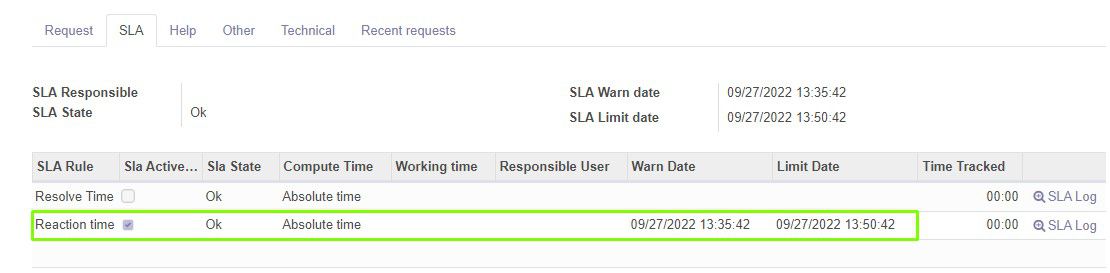
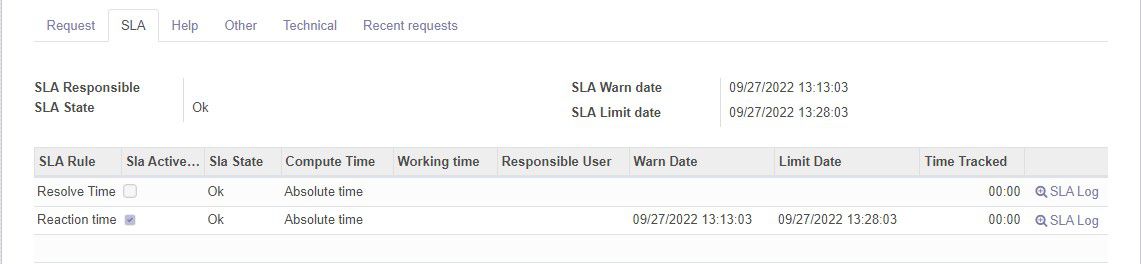
Now we can open the SLA tab of the request and check if the SLA works as we configured.
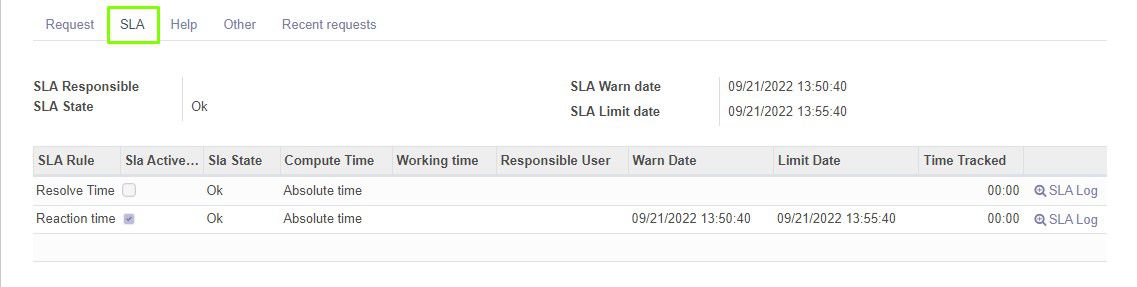
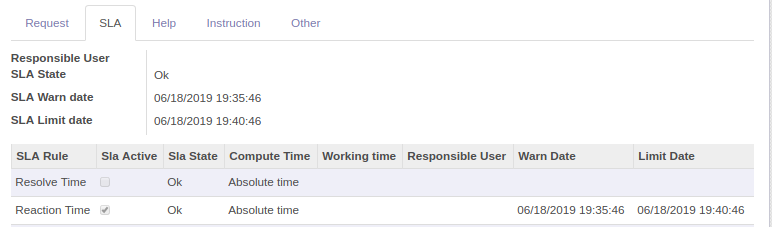
SLA tab contains SLA data. Let's have a look at these fields:
- SLA State - Ok, that means SLA time limit has not yet passed
- SLA Warn date - shows the date and time when warning shows up on that request. We did not set the warning time, so it starts with the time the request was submitted.
- SLA Limit date - shows the date and time limit (after that time SLA is failed).
- In the fields below, displays SLA rules for this request. The one with the selected checkbox is an active rule at the moment.
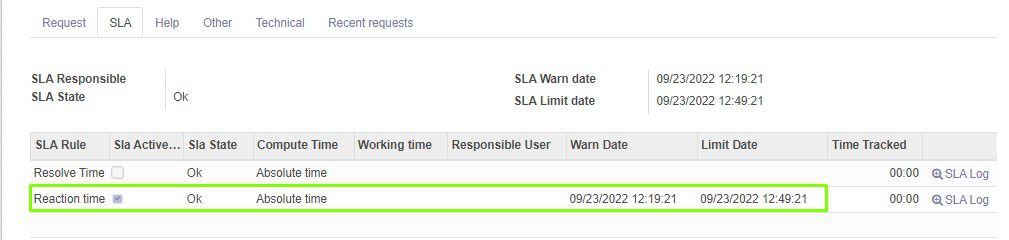
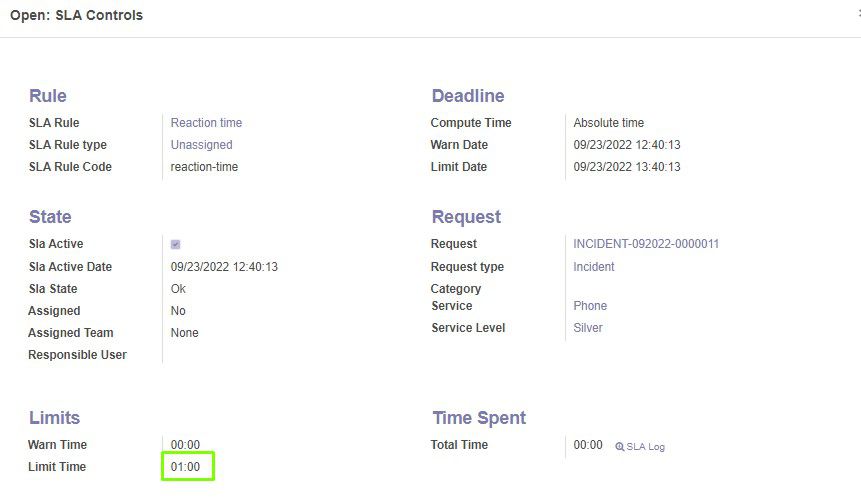
So we clearly see that the active rule at the moment is Reaction Time, and SLA Limit date is set to 5 min (like in the SLA Rule line for Phone service with Platinum level of service).

Now we assign the request. Click Assign at the bottom of the form and select one of the users (we assign administrator).
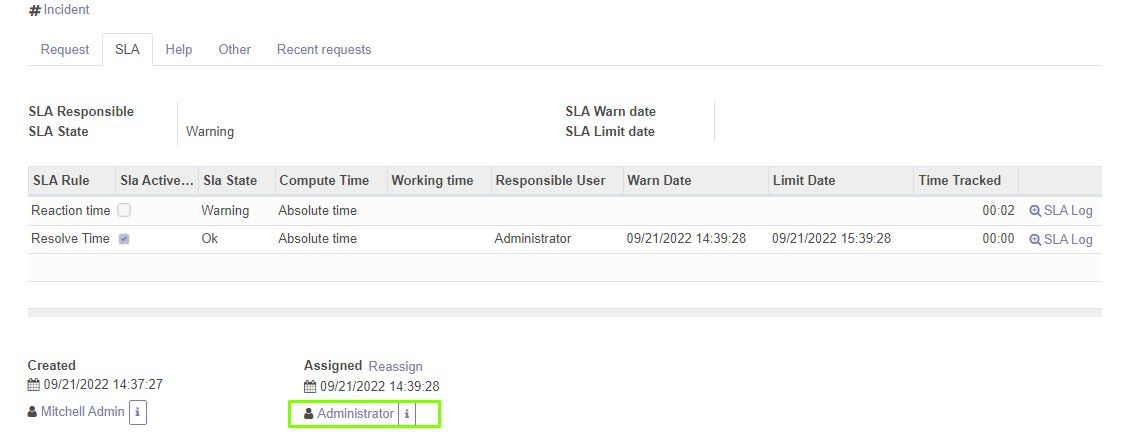
As we can see, the active SLA Rule is changed and now it is Resolve Time.

SLA Limit date is set to 1 hour, as we configured in the SLA Rule line for Phone service with Platinum level of service.

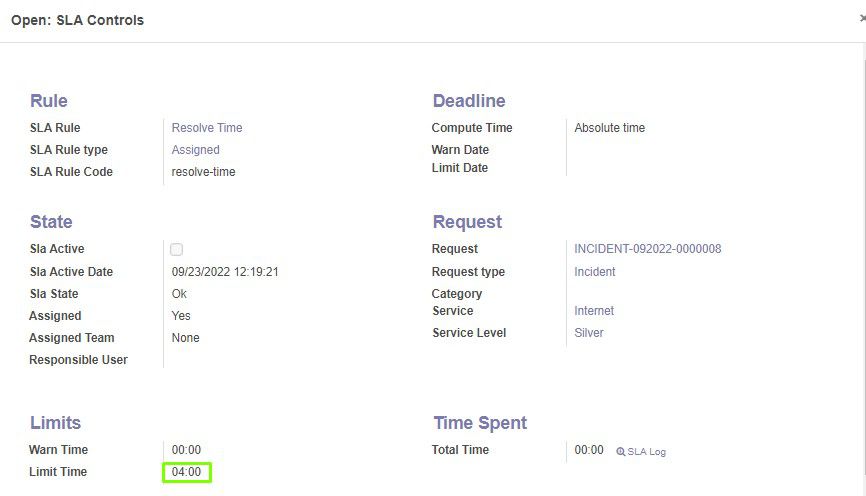
You can also click on the rule right here in the list to see SLA Control. It displays more detailed info on SLA.
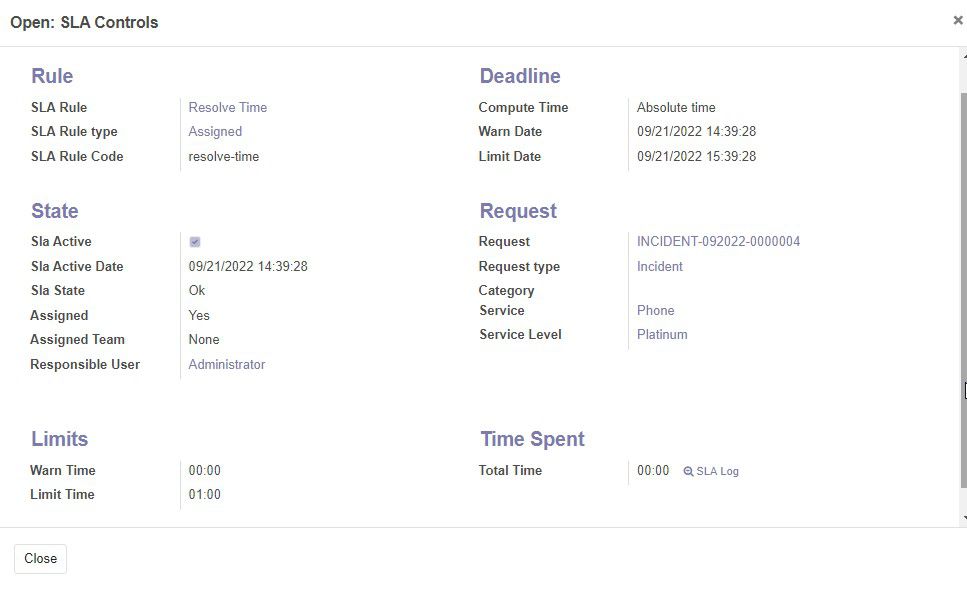
SLA Log will record all the request events (assignments, changes of stages, etc) while the current SLA Rule is active.
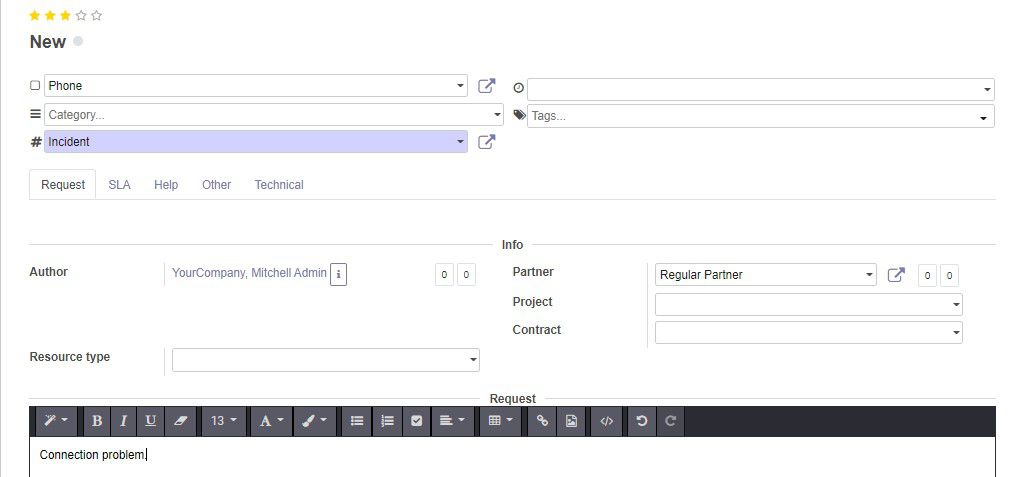
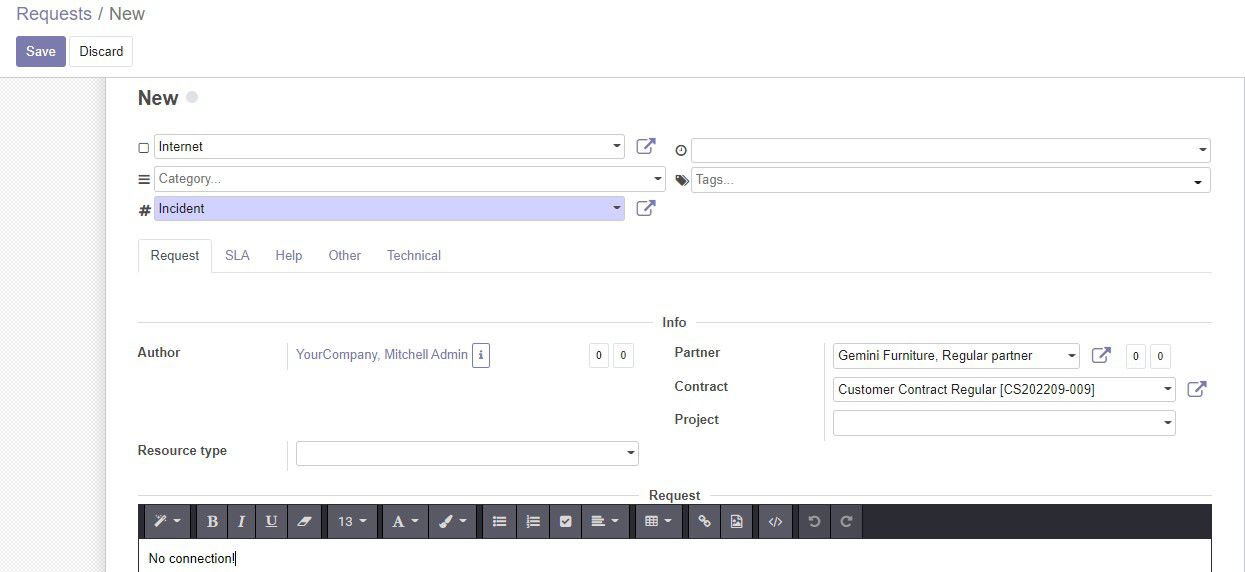
Now let's create another incident request for Regular Partner. He assumed to have problems with internet connection.
After submitting the request, open the SLA tab.
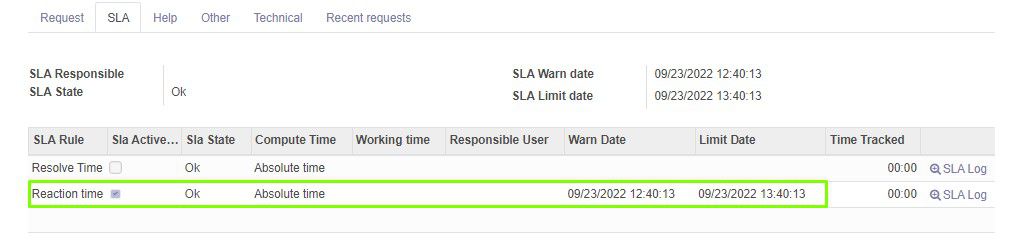
We can see the active SLA rule is Reaction Time. SLA Limit date is set to 30 min, as we configured in the SLA Rule lines for Internet service with Silver level of service.

Once assigned, Resolve Time became an active SLA Rule. And SLA Limit date is set to 4 hour, as we configured for Internet service with Silver service level.
Let's create one more request for Regular Partner. This time we select the Phone service.
Our Regular Partner has Silver level of service for the Phone service. In SLA Rules we did not add the line with the Phone service and Silver service level. In that case, SLA Rule will use time limits of the main rule.
SLA Limit date is set to 1 hour, as we configured for the main Reaction Time rule.
Create Service Resource Contract
Service Resource Contracts allow to specify resources and services that will be used by this contracts.
In the resource lines of the contract, we can select resources. We can specify services for each resource in which it will be used. We can also specify levels of service for each service of the selected resource.
In addition, we can select services without resources in the service lines. And we can specify level of service for each selected service.
Let's create some simple demo resources.
Open the Resources app. Click Create to create a resource.

On the resource form, enter the Name of a new resource.
In the Services drop-down menu, you can select related services. You will be able to use the current resource with these services.
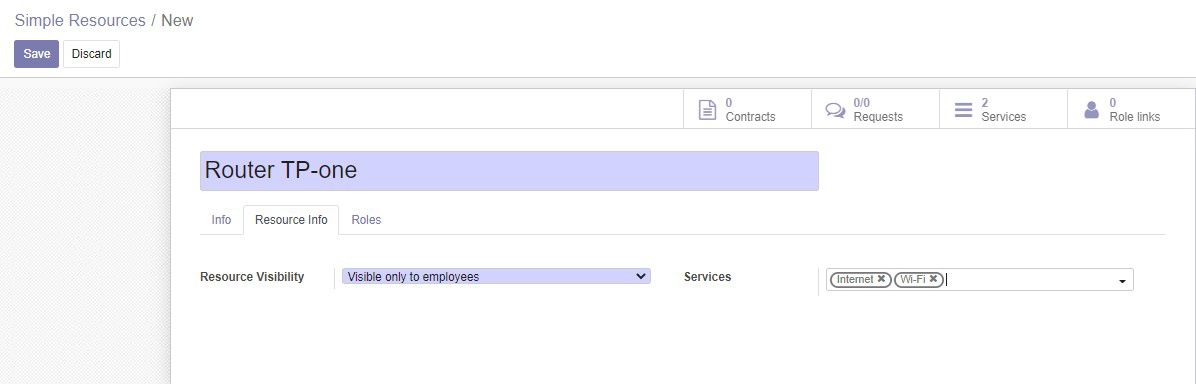
Let's create another resource.
We can also create roles and role links for resources. Roles define what a customer will do with provided resources (e.g. user, owner, administrator, etc.). Role links allows to link a particular partner to a particular resource by role.
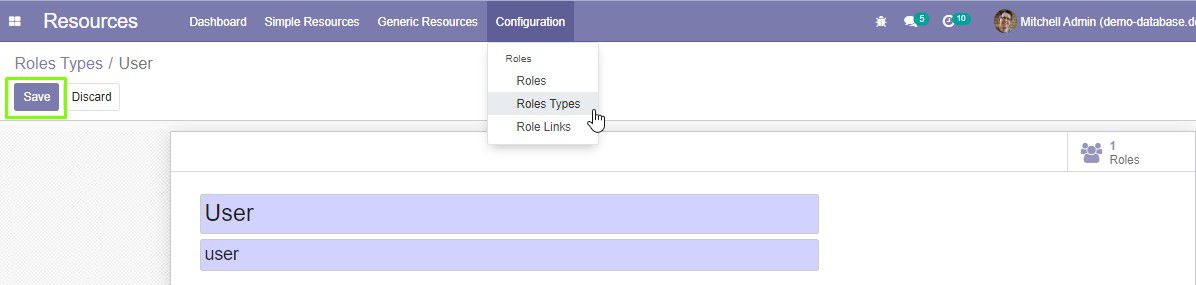
For the beginning, we need to define Role Types. These are global types of resource roles.
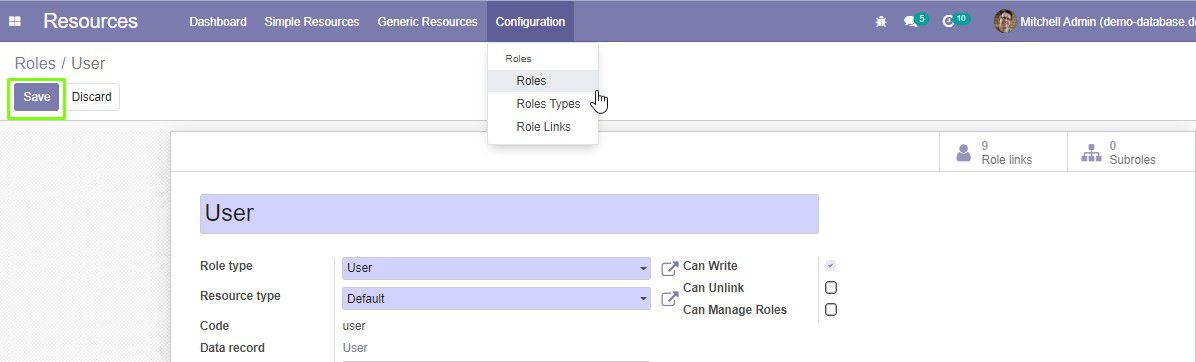
Click Roles Types, then click Create to create a new role type. Enter the Name of resource type and save the form. Let's create User and Administrator role types.
Now we can create Roles. Roles are created for certain type of resource.
Click Roles, and then Create to create a new Role.
On the form, enter the role Name, select Role type and Resource type for that role. Let's create User and Administrator roles for the Default type of resources.
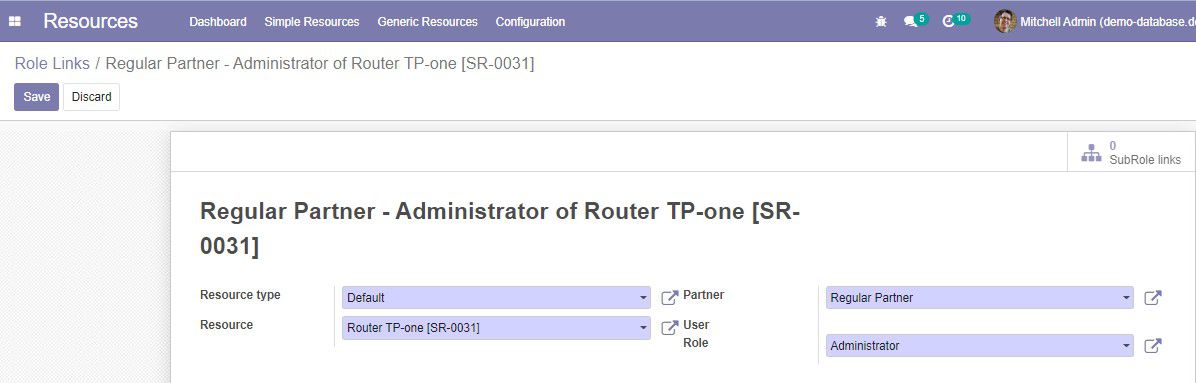
Now let's create Role Links for our Regular Partner.
Click Role Links, and then Create to create a new role link.
We want our Regular Partner to be a User of a Deskphone, and an Administrator for the Router resource. So we create 2 appropriate role links like in the following example:
Now we can create a contract with these resources.
We will create a contract for Regular Customer and add resources to this contract.
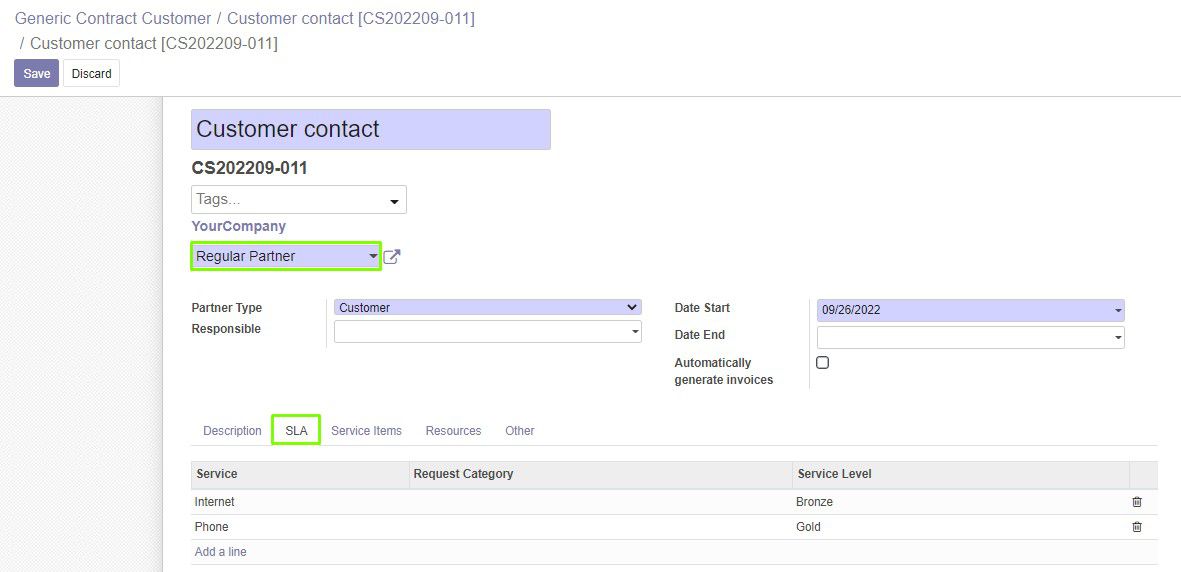
On the contract form, open the SLA tab. We create Service Lines with the following services and service levels: Phone - Gold; Internet - Bronze.
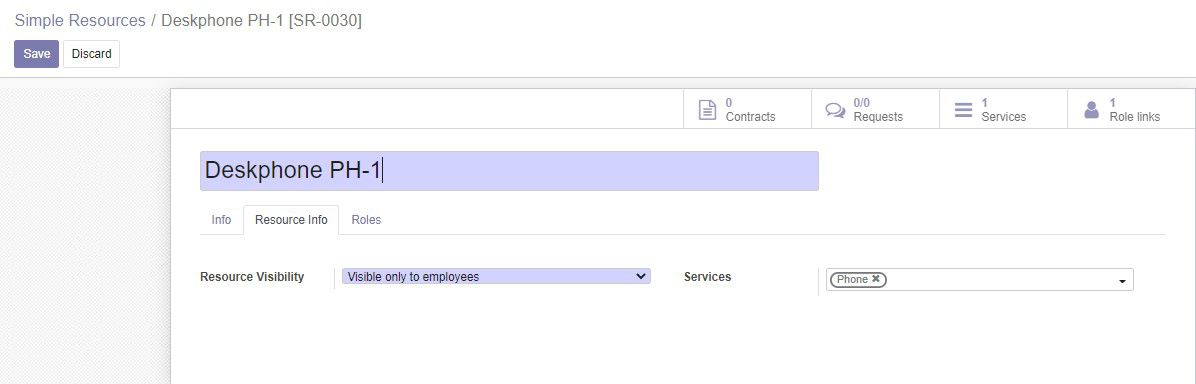
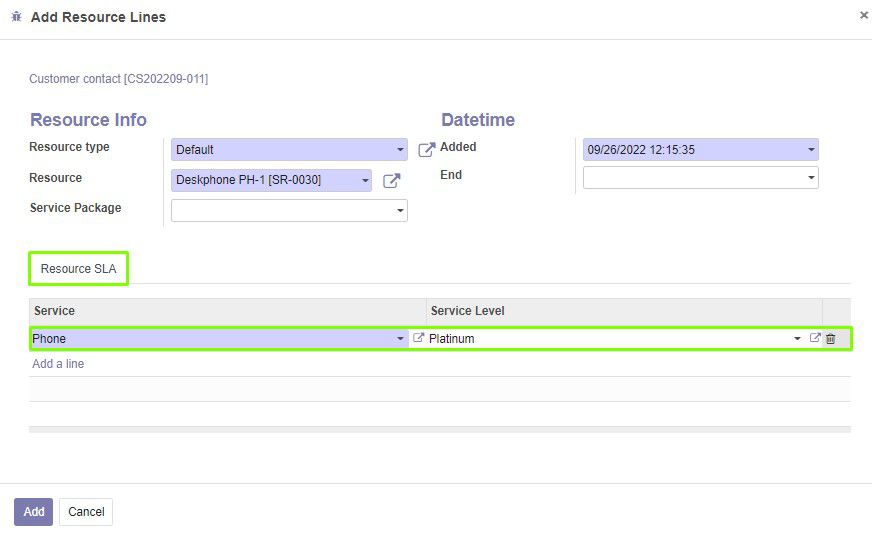
In the Resource SLA tab click on the Add Resource Lines button. In the open form, select the Resource type, and then specify the Resource for this line. Let's select the previously created Deskphone PH-1.
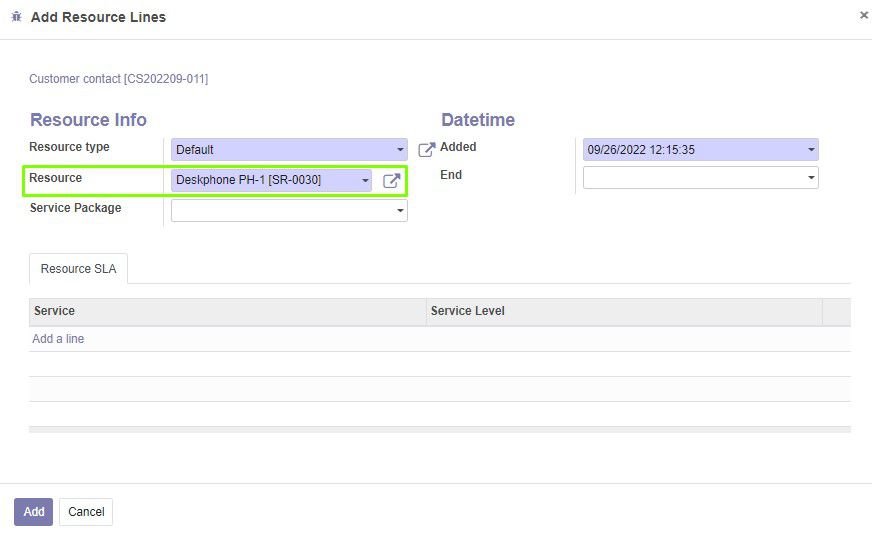
Let's add a service line and specify to use Platinum level of service when using the Phone service with the Deskphone resource.
Save the contract. Click Confirm to activate the contract.
Now we can create multiple incident requests to check how the SLA will be calculated for this partner with the provided resources
-
In the first request, we select the service (Phone), related partner (Regular Partner) and the resource (Deskphone PH-1). Selected resource and service included in the contract with this partner.
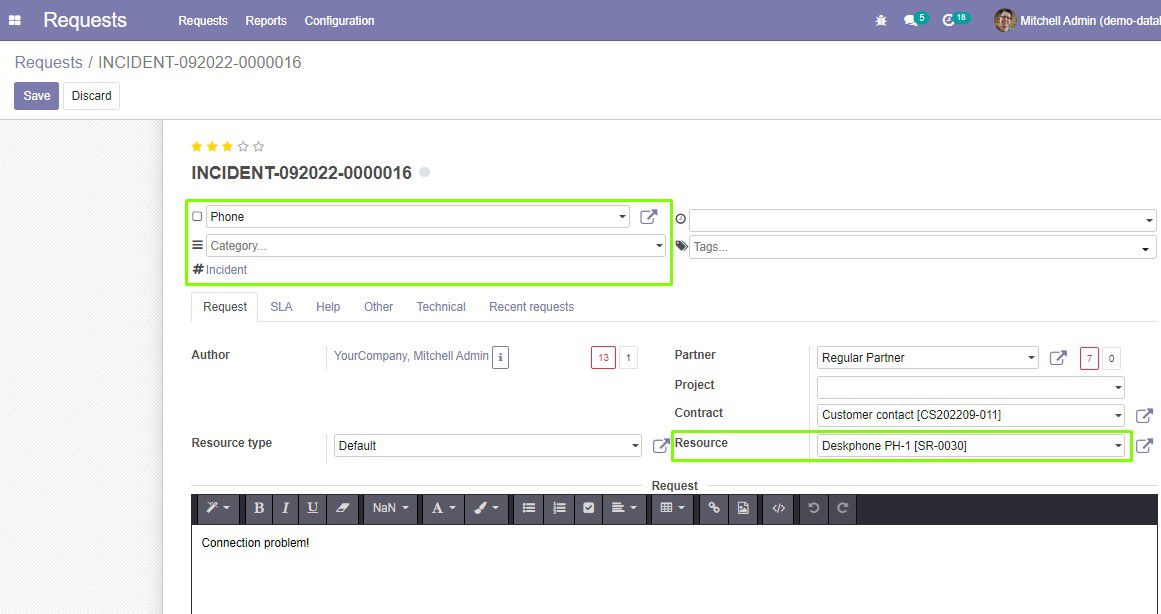
On the SLA tab, we can see the Reaction Time of 5 min.
This time limit we set for the Platinum level of service of the Phone service in the pre-configured SLA Rule.

This level of service (Platinum) was chosen because we specified it in the contract for the Phone service of the Deskphone PH-1 resource.

-
The second request will be the same, but we will not specify any resource: service (Phone), related partner (Regular Partner).
On the SLA tab, Reaction Time is 15 min.
That is the time for the Gold level of service of the Phone service.

We did not specify a resource in the contract, so the Gold service level was chosen from the Service Lines of the contract for the Phone service.

-
We create the third request with the following data: service (Internet), related partner (Regular Partner), no resource is specified.
There is no rule line in the SLA Rule for the Bronze service level of Internet service, so time limit of the main rule will be active (1 hour).
And that is what we see on the SLA tab for this request.
Conclusion
As a conclusion, we can summarize basic rules that system uses to calculate Service and Level of Service for SLA of requests.
- If we have an active contract with included resources, and we specified related resource in the request:
- the system will try to use service and level of service from the contract for this resource
- If no resource is specified in the contract, or in the request:
- the system will try to take service and level of service from the Service Lines of the contract
- If no service lines in the contract, or no contract at all:
- default partner's level of service will be used
Selected service and (or) level of service then will be compared to ones in the lines of the SLA rule. If conditions are met, SLA will use time limits of the current rule line. If conditions are not met, time limits of the main rule will be used.