Addons Management
To manage available addons, open your GitLab repository by the provided link.
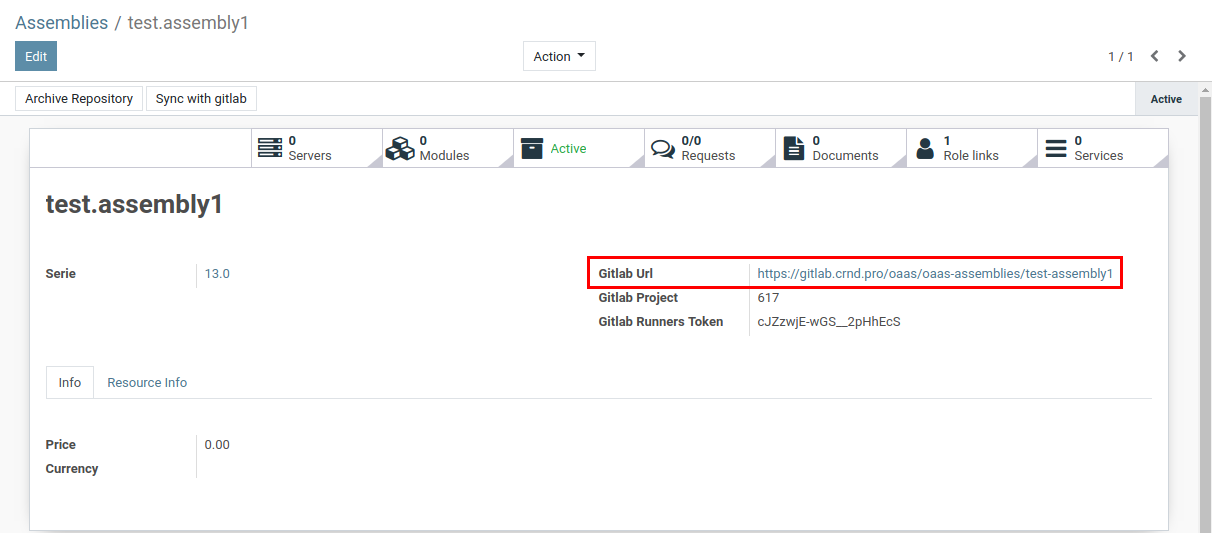
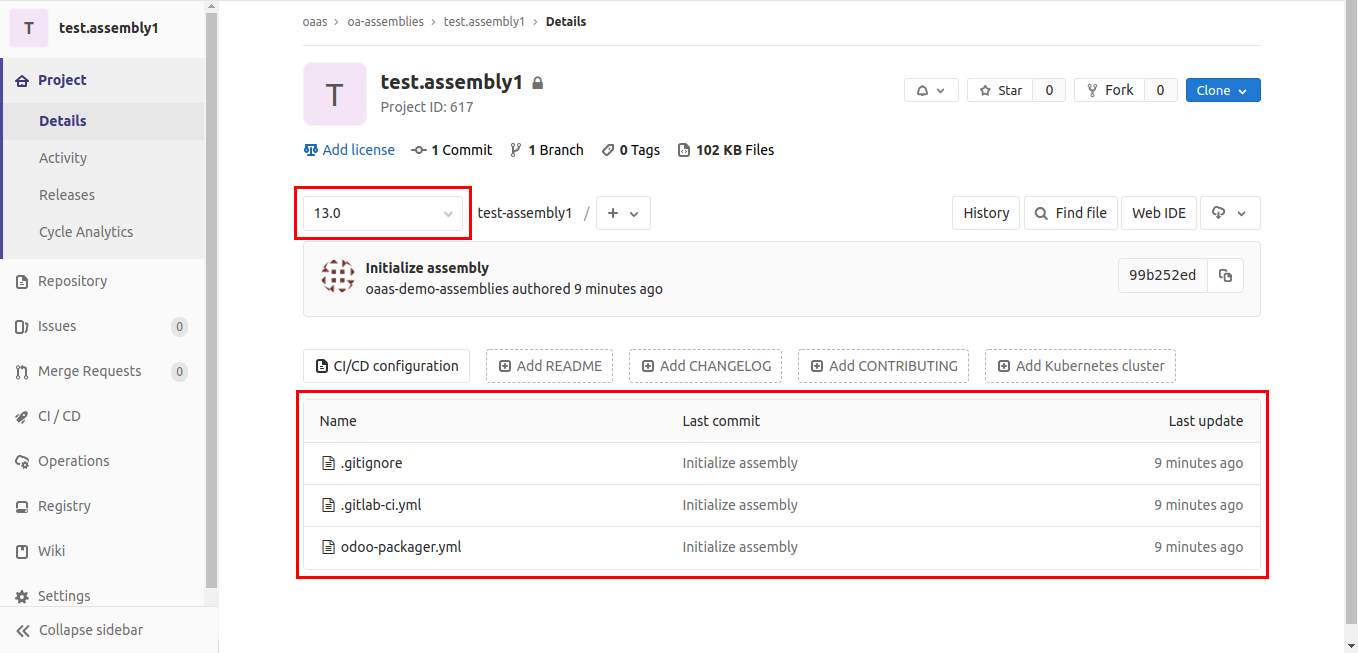
The project page of your repository opens.
At the top of the page, you will see the main branch of the project. It will match your Odoo version (e.g. 13.0 for Odoo13, etc).
Below, you will see the list of files that are in your repository.
You can add or remove addons by editing the odoo-packager.yml file.
Note
For security reasons, editing files directly in your main branch is prohibited. All changes to the main branch should be done through the merge requests.
Changing files directly in your main branch may disrupt the work of your server.
To add or remove addons in your assembly, you need to do the following:
- create a new branch from the main branch
- on the new branch, edit odoo-packager.yml and commit your changes
- create merge request from new branch to main branch
- wait until automated packager finish to gather addons
-
if the package is done without issues, merge changes into the main branch
-
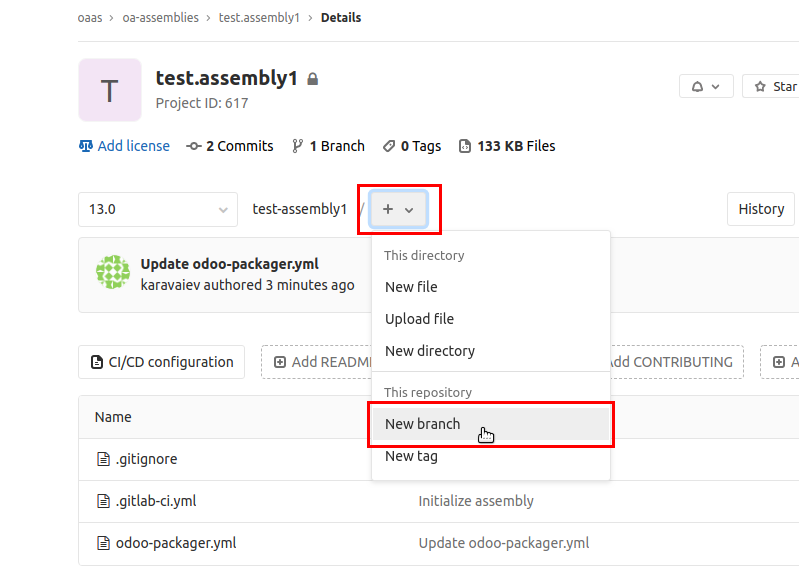
To create a new branch, click the drop-down menu next to the main branch, and then click New branch.
-
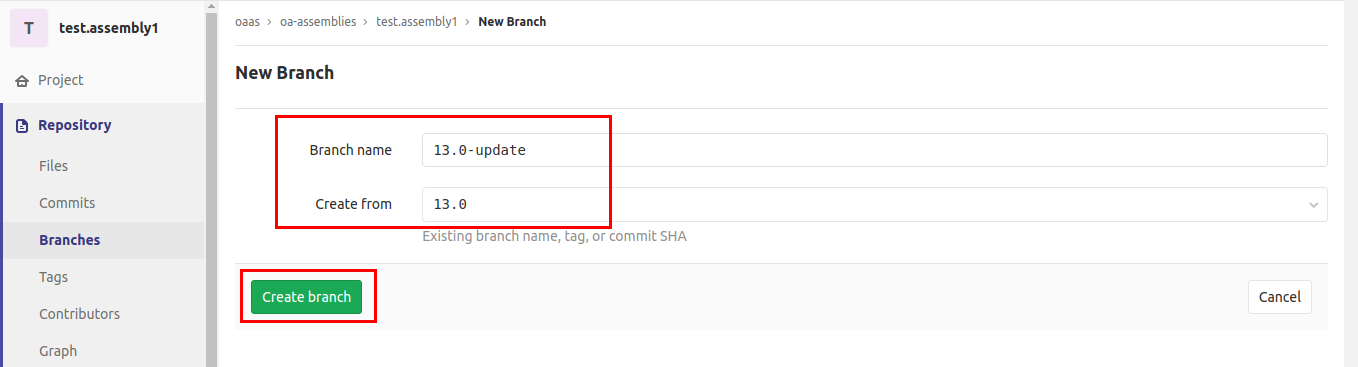
In the opened page:
-
enter the name of the new branch (e.g. 13.0-update)
- in the Create from field, specify your main branch
- click Create branch
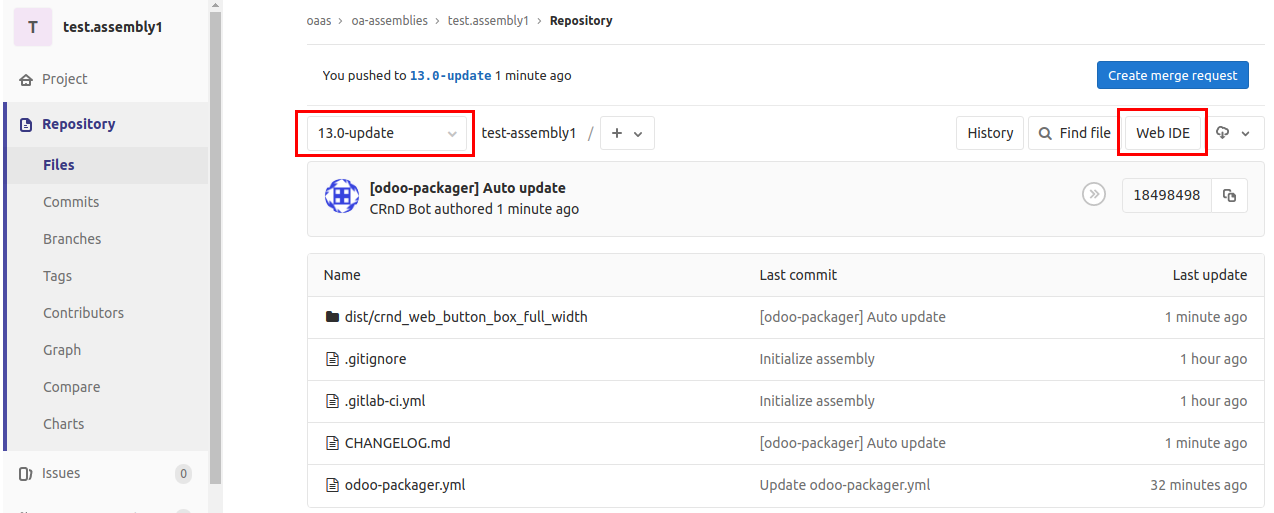
New branch will be created and you will be redirected on the project page.
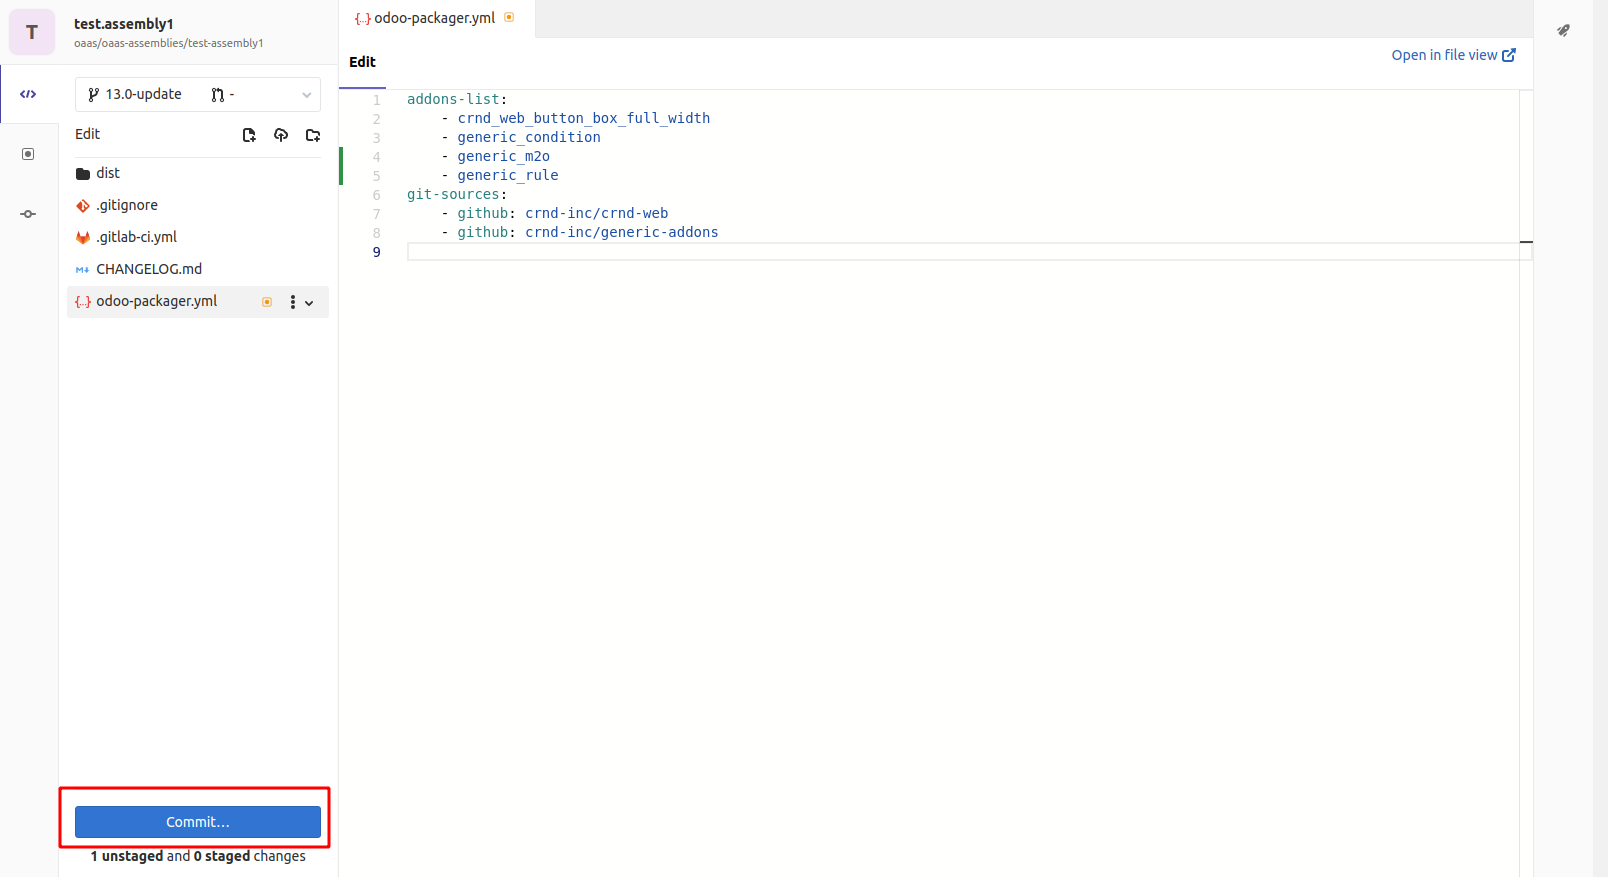
- On the project page, make sure that you are on your new branch, and click Web IDE. This will provide you with a convenient interface for editing files.
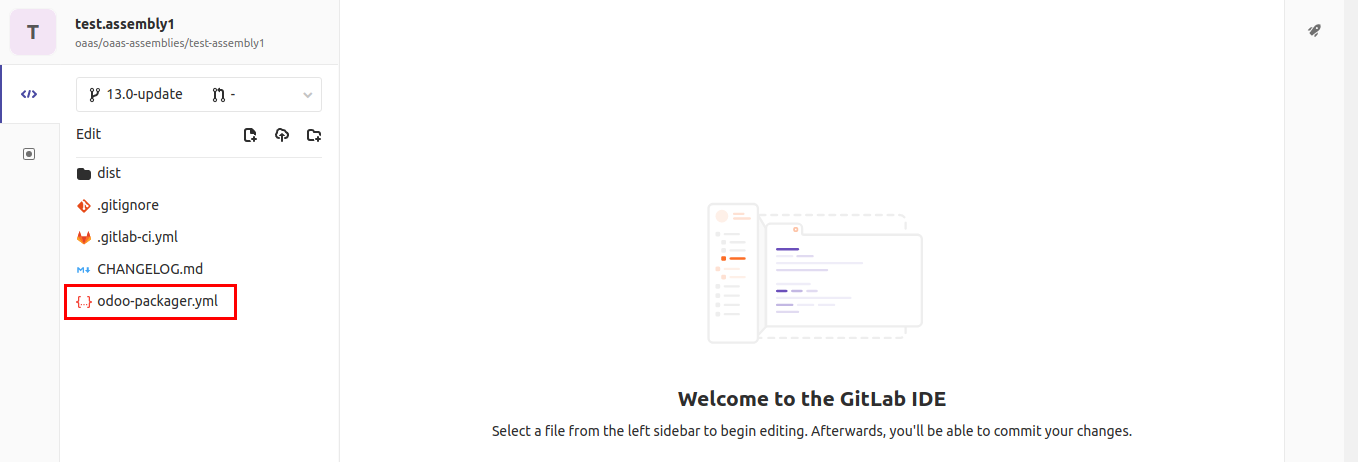
- On the left, click the odoo-packager.yml file for editing.
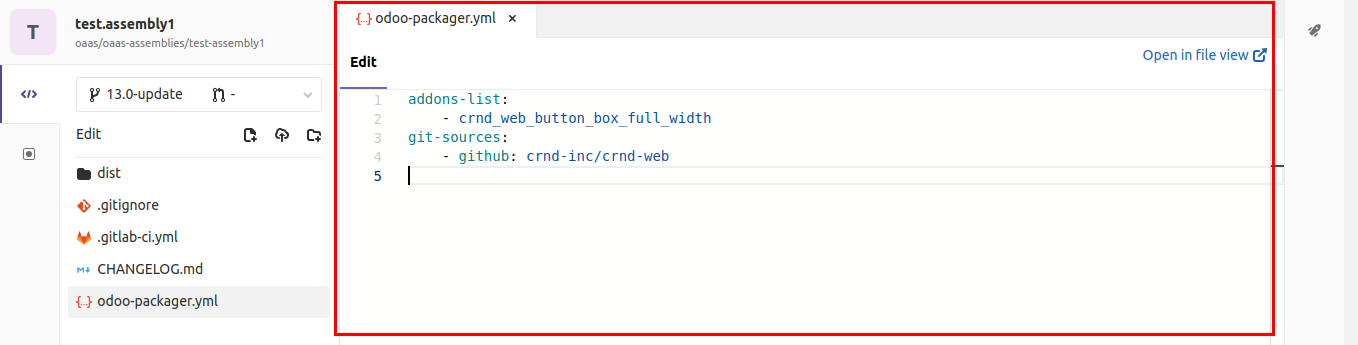
- The file content will be opened in the integrated editor.
-
To add new addons:
-
add technical names of all required addons to the addons-list
- if addons have dependencies, you need to add them to the addons-list too
- specify source git repositories for added modules in the git-sources list
- pay attention to indentations (left indentation - 4 spaces)
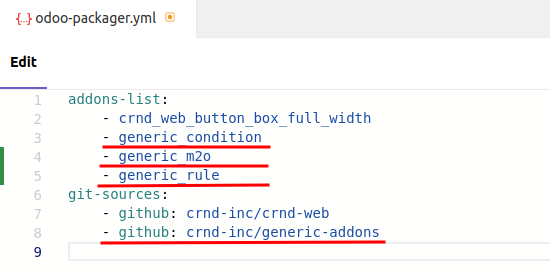
To delete addons from your assembly, just remove them from the addons-list.
In the example above, we added the generic_condition addon that is located in the crnd-inc/generic-addons github repository. We also added 2 addons on which it depends. They are also located in the crnd-inc/generic-addons github repository.
Note
To add a module that depends on other modules to your repository, you also need to specify all dependencies in the addons list and their git sources.
This is made for security reasons.
- Click Commit... the changes will be staged.
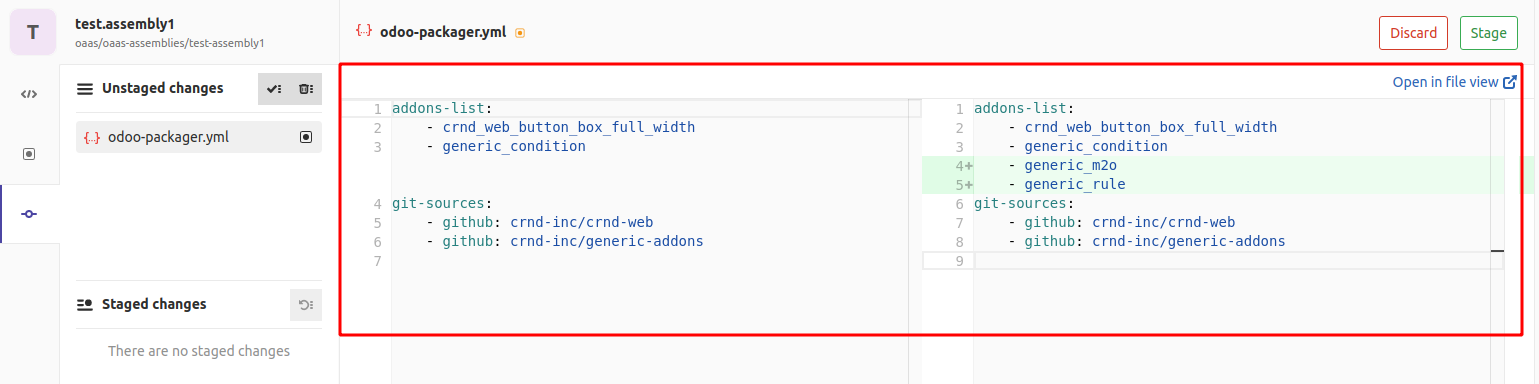
- Now you will see the difference between the previous and new versions of the file. You can check if everything is correct.
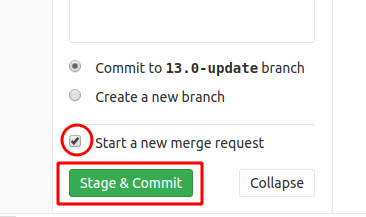
- At the bottom-left of the page, select the Start a new merge request checkbox. This will create a merge request after the commit. To commit your changes, click Stage & Commit.
-
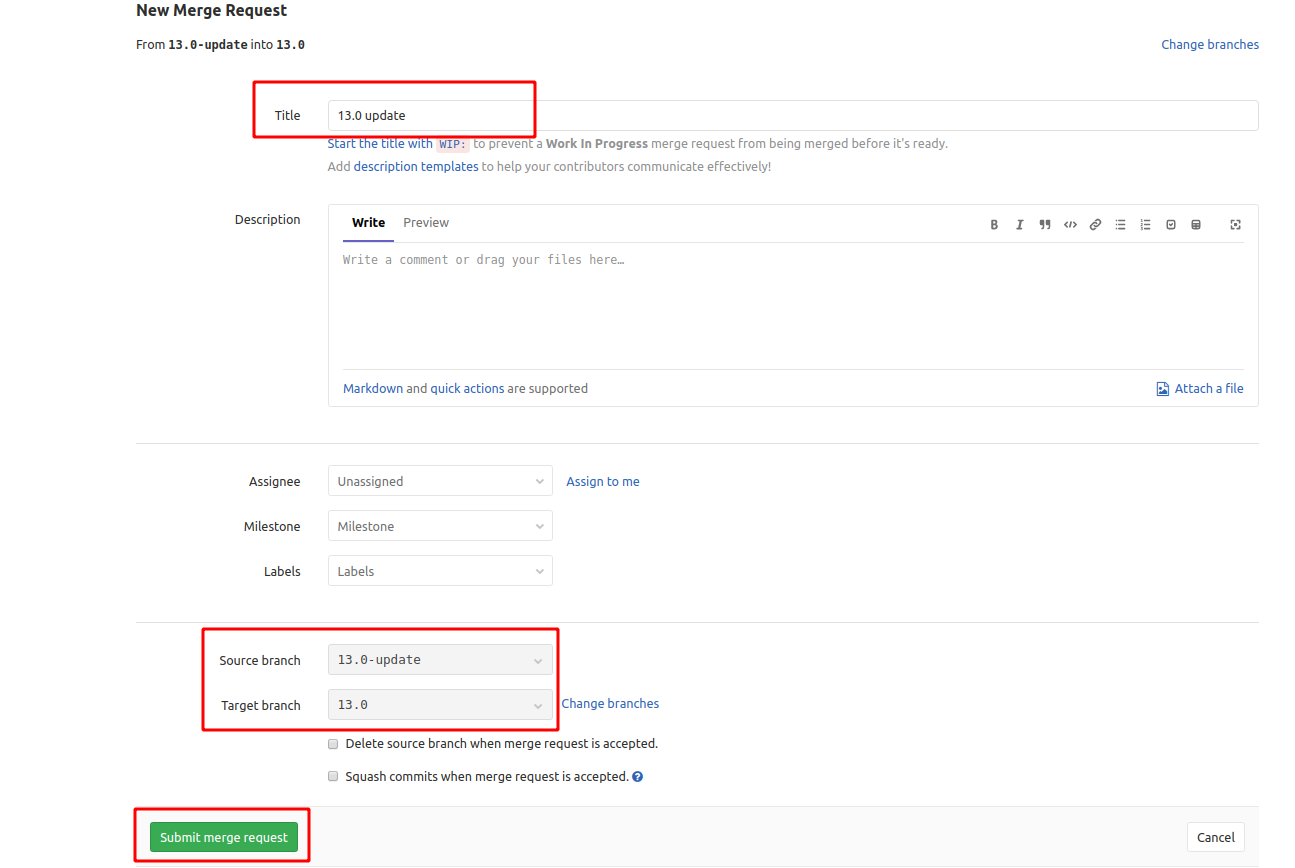
A page for merge request opens. On this page:
-
Enter the title for merge request (it may be filled automatically)
- Select Source branch - this is the branch where you made your changes
- Select Target branch - this must be your main branch (e.g. 13.0)
- Click Submit merge request
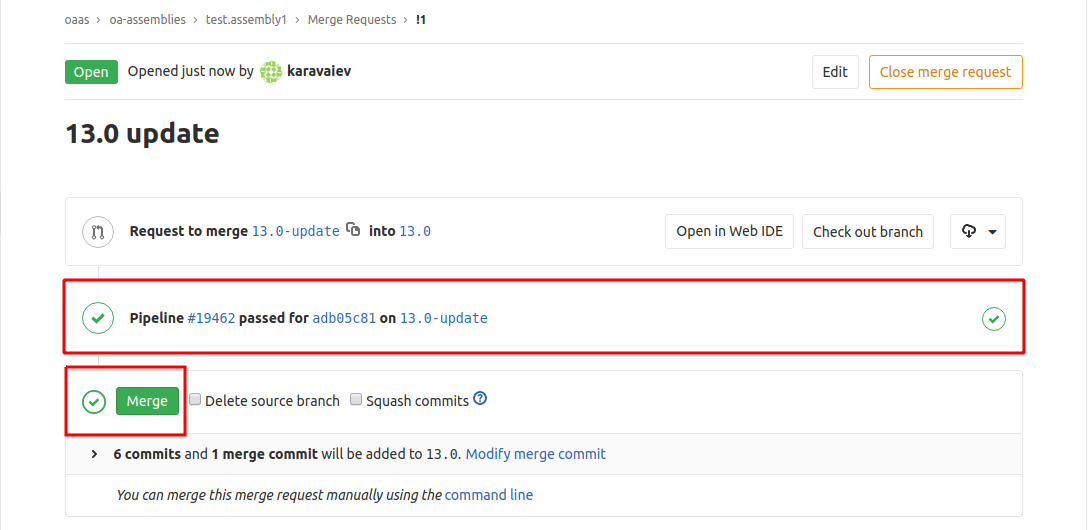
Merge request will be created and you will be redirected to the merge request page.
-
On the merge request page:
- Check the pipeline status for the branch with changes. If it is a green check mark, your pipeline is passed successfully and your new addons were packaged. This mean you can merge your changes into the main branch.
- Click Merge to merge your branches.
Note
Your pipeline may fail. In this case, you will see the Failed status on your pipeline highlighted with a red color. Pipeline may be failed if the module's name was written with errors, if there are missing dependencies, or from other technical reasons.
To see the reason of the failure, open the pipeline, click on the failed job and read the error message.
While pipeline is failed, you will not be able to merge your changes into the main branch.
-
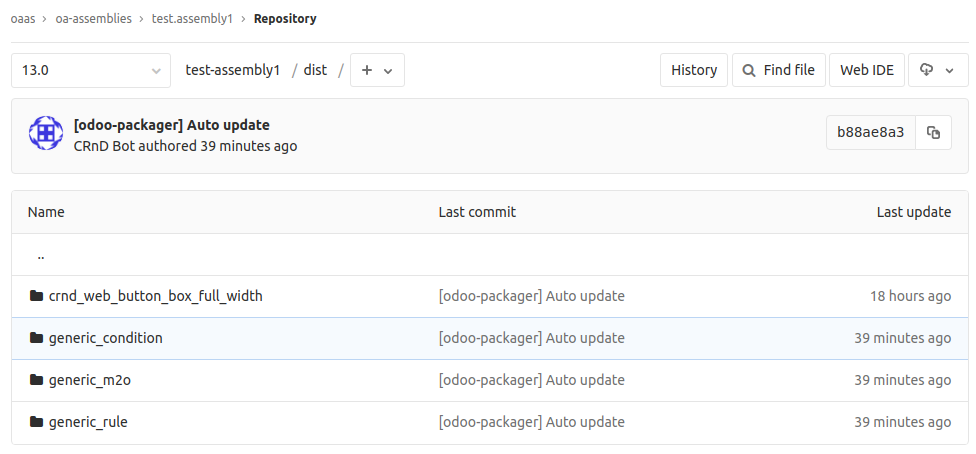
After your branches are merged, all new modules are available in your assembly. New modules will be added to the dist directory of your repository. Click it to view its content.
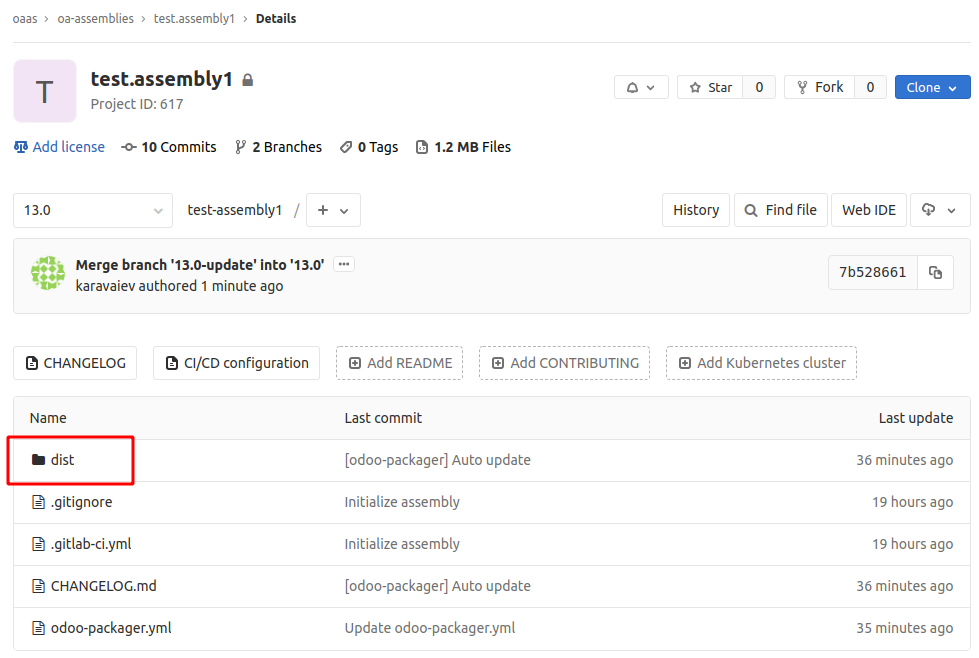
Here you can see all specified addons in your repository.