How to Set Up Notifications
Bureaucrat system has multiple options for setting up notifications:
- standard Odoo notification settings;
- group of settings that applies to the specific type of request;
- possibility to set up sending notifications using automated actions.
Standard Odoo Notification Settings
These settings are user-specific and apply to users that are the followers of a request or type of request. If these settings are configured for a specific request, they will apply only to the current request. If you make configurations for a request type, these settings will be applied to all requests of this type.
More information about notifications and followers you can read in the Notification Management section.
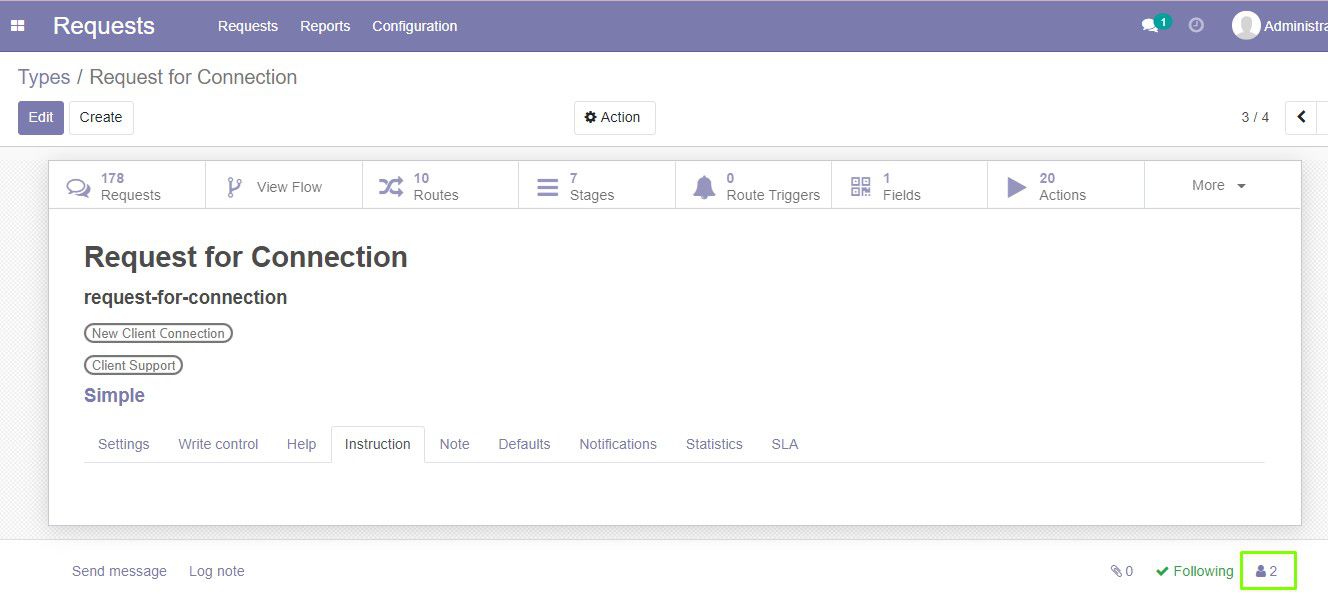
1. To open the notification settings, click on the Followers icon on the form of request or type of request.
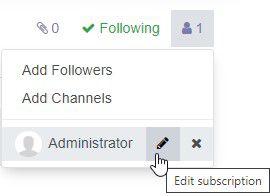
2. Point the required user (follower) and click the edit icon that appears.
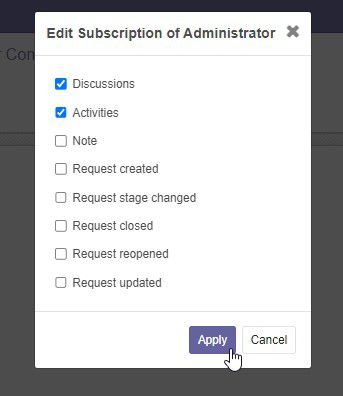
3. A window with the settings opens. Select the desired subscription for this user and click Apply to save the settings. The current user will receive notifications on the selected events.
Request Type Settings
These settings will be applied for all requests of the current request type.
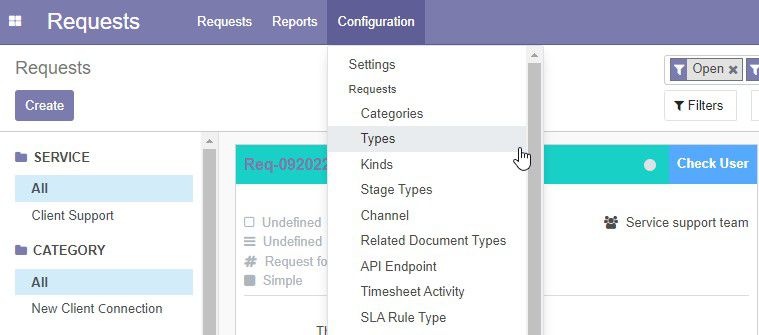
1. Open the request type configuration, and select the desired type of request.
2. On the Request Type form, open the Notifications tab.
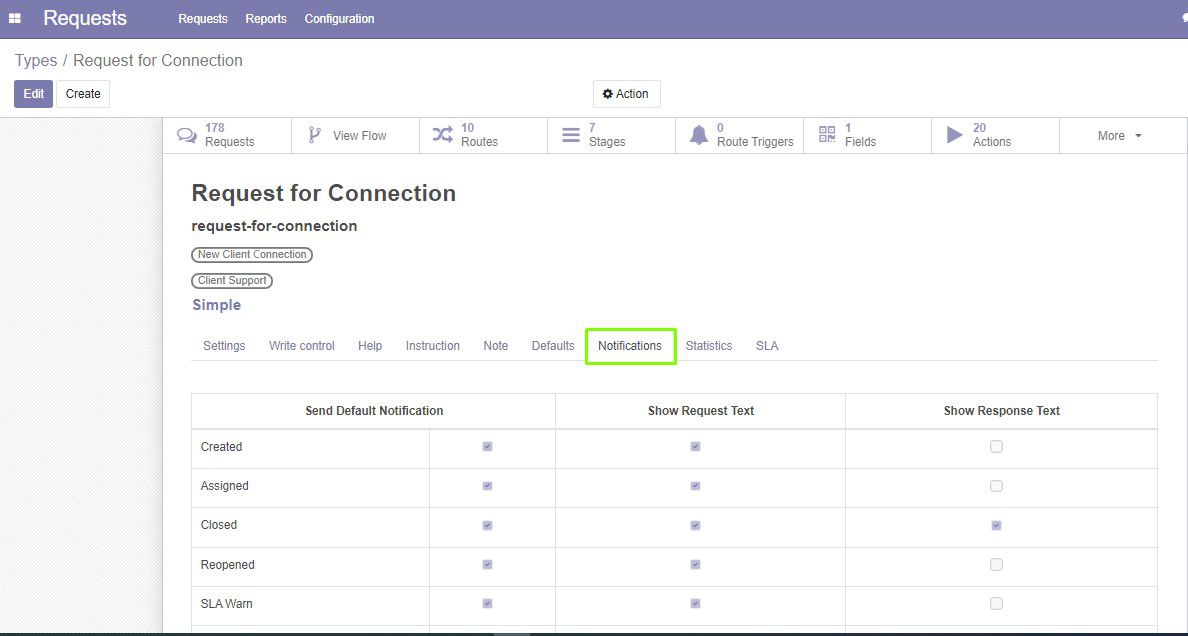
Select all the required events when you want the system to send notifications. You can select Show Request Text and Show Response Text to show the text of request / response in the sent notification.
Note: not all the followers receive selected notifications:
Created, Closed and Reopened notifications are sent to the user who created the request.
Assigned, SLA Warn and SLA Limit notifications are sent to the assigned person.
Set Up Automated Actions to Send Notification
1. You can also set up automated actions to send emails on certain request events. You need to install the Generic Request (Actions) addon to be able to do this configuration.
2. Click Actions on the form of the request type.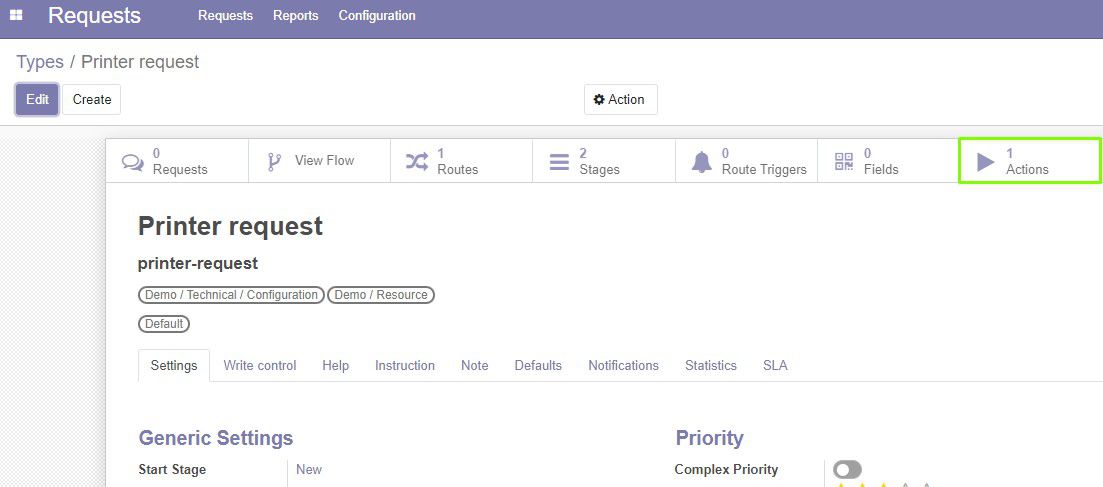
3. On the Actions page, click Create to create a new action.
4. Fill in the Action form. You can read more about actions in the Generic Request (Actions) guide.
5. Select Events in the appropriate field when you want to trigger sending email.
6. Select the Send Email type of action.On the Send Email tab below, specify the Email Template for the message. You can select email template or create a new one, in which you can specify recipients, copies, preferred reply addresses, email content, even schedule send date of the email.
7. Save the Action.
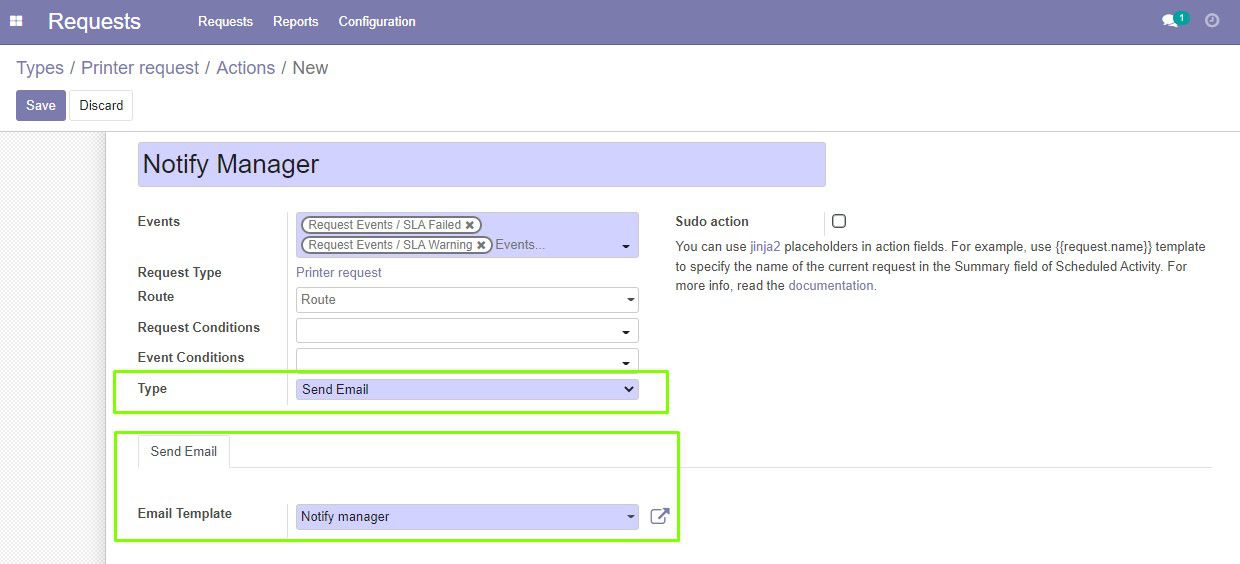
In our example, the system will automatically send emails to the manager in cases when time of resolving the Printer Request reaches the SLA Warning or SLA Failed status.