Let's imagine the case where we`ve got one service Telephony. For the requests with this service we create two categories: Mobile telephony support and Fixed telephony support. Every category is bound to a certain team. In this article we will configure the assignment of request for incident to a certain team according to the category of the request. For example, configure the automatic assignment of the request with category Mobile telephony support to a team Mobile telephony support. To do this we will create the assignment policy and rules by which this assignments will take place.
Before we start to create the assignment policy and its' rules, we need to create two conditions. First if the categoty is Mobile telephony support, the request will be assigned to a team "Mobile telephony support." Second if the category is Fixed telephony support, the request will be assigned to a team " Fixed telephony support."
Let's create the conditions
The Generic Conditions are located on the Rules page. Click Rules from the left menu and select Generic Conditions. Click the Create button.

On the form that opens, do the following:
- Enter the condition name.
- Select the model Request.
- In the Type field, select Related field.
- Click the Field drop down menu and select the Category (request.request).
- Select Contains as an operator, another Value field appears, select the Mobile telephony support value here.

Using the same logic, create the second condition.

Creating the assignment policies
Now when the conditions are ready, we can proceed to the assignment policies and rules.
The Assignment policies are located on the Rules page. Click Rules from the left menu and select Assignment policies and click the Create button.

On the form that opens, do the following:
- Enter the policy name.
- Select the model Request.
- To create assignment policy rules, click Rules. This will save the created policy.
- Click Create to create a rule.

We will create 2 rules using the preconfigured conditions.
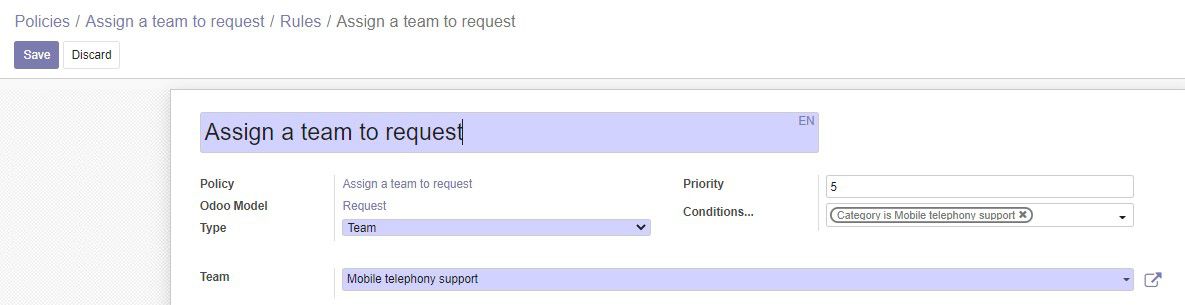
- On the rule form, enter the rule name.
- Select the type - Team. The assignment also can be submitted to a Team Leader, Team Member or Team Task Manager. When creating a team, we can specify the employee for a position of Team Leader, Team Member or Team Task Manager.

3. In the Team field, select the team for assignment. In our case, the team - Mobile telephony support.
4. In the Conditions field select the preconfigured condition Category is Mobile telephony support. Save the rule.
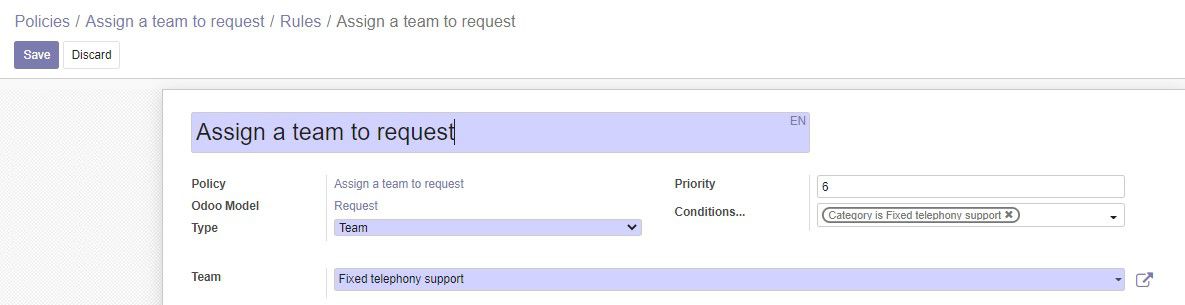
Using the same logic, create the second rule.
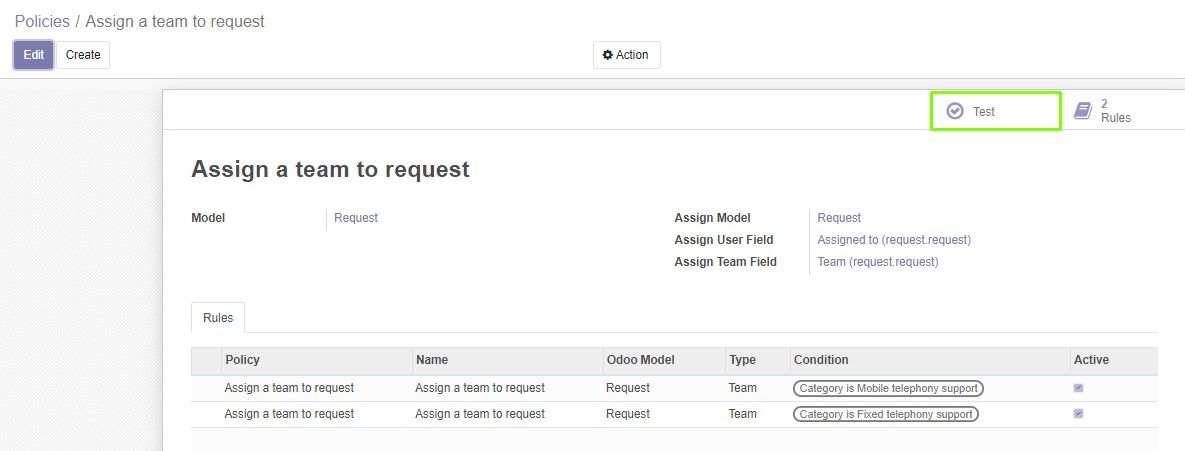
Test the Created Policy
To check the assignment policy, click Test on the policy form.
On the form that opens:
- In the Policy field, select the created assignment policy.
- In the Object ID field, select the object on which to test the policy. In our case this is a request that was created by the administrator.
- Click Test.

At the bottom of the window, you can see the overall result of testing (the Result Get and Result Convert fields).

Below you can see an Assign Debug Log. It displays the result of testing each rule of the policy.

Set Up Automatic Assignment
Now let's set up the automatic request assignment. Make sure that the following module is installed:
- Generic Request (Actions) - this module allows to perform automatic actions when the request navigate along the route.
Click Requests in the main menu on the left. Then click Configuration -> Types -> Request for Incident -> Actions.
On the actions page, click Create and fill out the form:
- Enter the action name.
- In the Events field, select the Request Events / Created.
- Select the type of action - Assignment.
- Click the Assign tab, select the Policy Assign Type. Next to the Assign policy field select the created assignment policy.
- Click Save.

Now when the automatic assignment is configured, a certain team will be immediately assigned for the Request for Incident according to request category.