The Request for Change (RFC) is a formal request for the implementation of a Change. It controls the lifecycle of all changes and contains all information required to approve a Change. In this article, we will configure the assignment of the Request for Changes to the change manager in our Bureaucrat system. For this purpose we will use the assignment policy. But before this some presets are needed to be performed. So we will do our configurations in small steps for a better understanding of what's happening and what needs to be done at one stage or another.
These are the logical steps we need to take to assign the RFC for a change manager:
1. Create a service and assign a change manager for this service.
2. Add the service to the request type RFC.
3. Create assignment policy for assignment the change manager for RFC.
4. Test the created policy.
5. Set up automatic assignment.
Create the service and assign the Change manager.
We start by creating a new service Internet and assigning a Change manager for this service. As the lifecycle of all Changes is controlled by the Change Manager. Open the Service applications, click Services and then click Create to create a new service. On the form, enter the name of the service and choose the required employee in the field Change manager. Click the Save button. .
.
Open the Requests applications, click Requests -> Types, and then choose the type Request for Change. Add the service Internet to the field Service.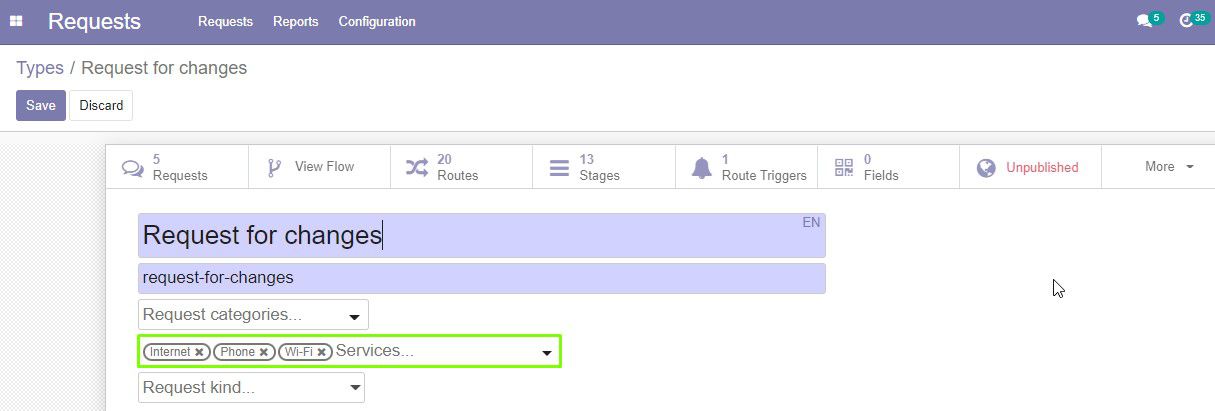
Create assignment policy for assignment the change manager for RFC.
Let's create an assignment policy to assign at a certain change manager for the Request for Changes.
Assignment policy is a set of rules for assignment a responsible person.
Model is a set of fields that describe an object. Each object has its own set of fields and, accordingly, records.
Assignment policy allows you to select required user based on the model and use this data for assigning a responsible person.
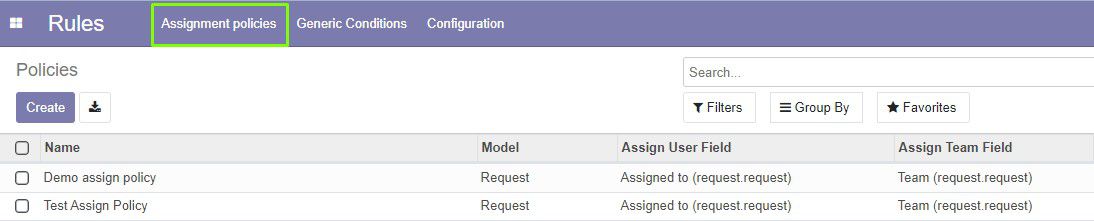
The assignment policy settings are located on the Rules page. Click Rules from the left menu and select Assignment policies.
When creating an assignment policy, we have no way to immediately select the change manager for the RFC. To create a policy that links to different fields of different models, you can use several related policies. This way you can get the required record step by step and return its value to the original policy.
Let's divide the creation of this assignment policy on stages and create the necessary related policies one by one.
- We need to apply the assignment policy to the change manager for a certaim type of request (RFC). So we are creating the policy based on the Request model and selecting the field Service (request.request). This field will refer to the Generic Service model in the related policy.
- The second related policy will be created based on the Generic Service model. The rule type of this policy is User field and it selects the user that is written in the selected field - Change manager (generic service).
To begin, we will create the assignment policy that will choose the service from the selected field of the Request model.
On the assignment policies page, click Create to create a new policy.
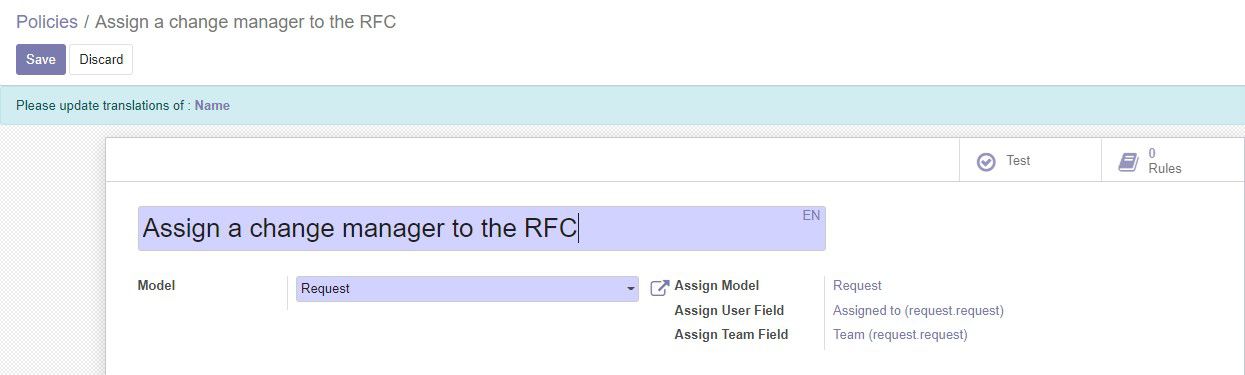
On the form that opens, do the following:
- Enter the policy name.
- Select the model Request.
- To create assignment policy rules, click Rules. This will save the created policy.
4. Click Create to create the rule.
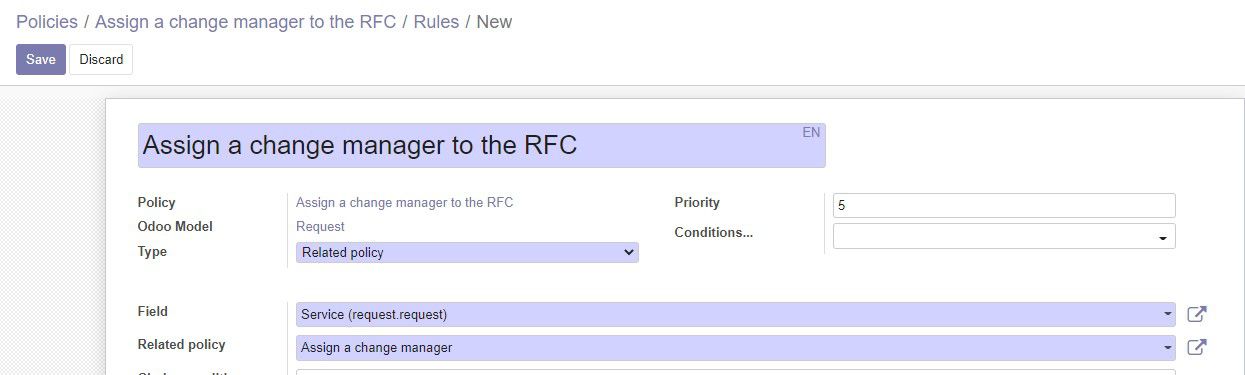
5. Enter the rule name.
6. Enter the rule name.Select the type Related policy.In the Field field, select Service (request.request).
7. In the Related Policy field, enter the name of the related policy (in our case - Assign a change manager) and click Create and Edit. Save the related policy as we need it for perfoming the next actions.Save the rule.
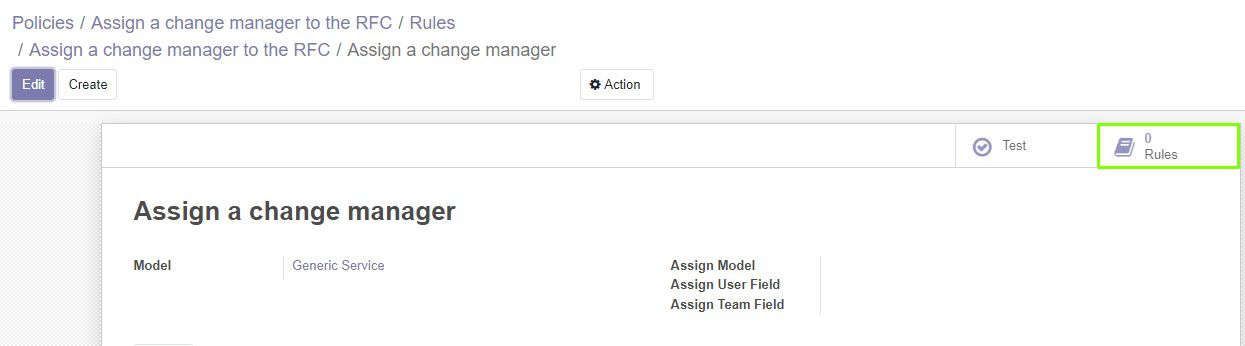
Finally, we will create the assignment policy that will choose the change manager from the selected field of the Generic Service model.
1. In the list of policies, select the previously created related policy (in our case - Assign a change manager).
2. Select the model Generic Service.
3. To create assignment policy rules, click Rules. This will save the created policy.
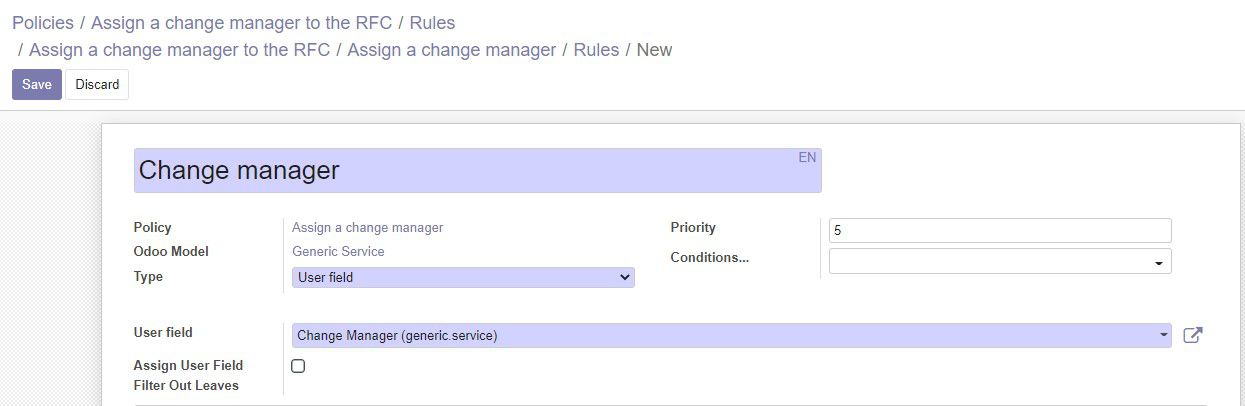
4. On the rules page, Click create a new rule and fill out the form.
5. In the Type field, select the User field.
6. In the User Field field, select Change manager (generic.service).
7. Save the rule by clicking Save.
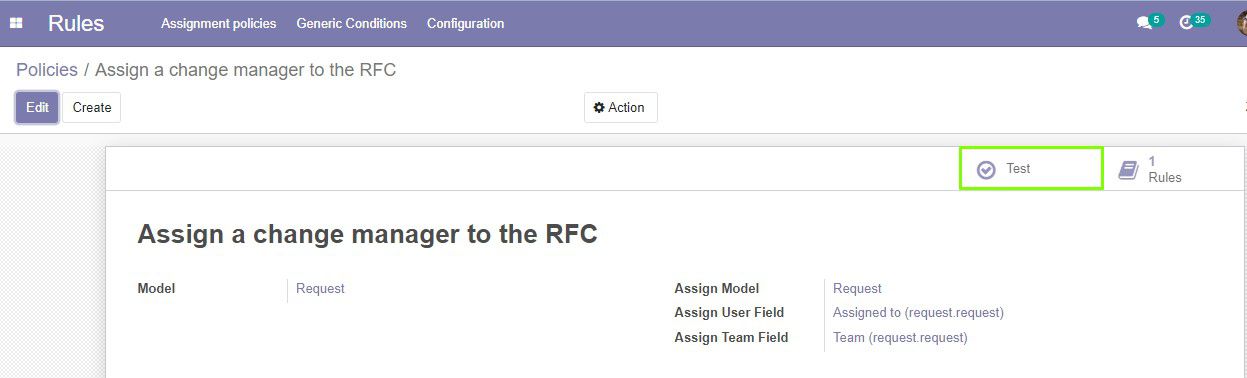
Test the created policy.
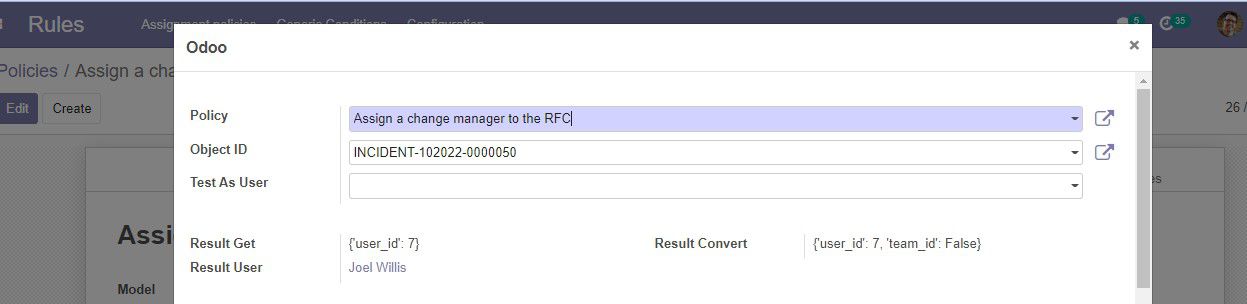
To check the assignment policy, click Test on the policy form.
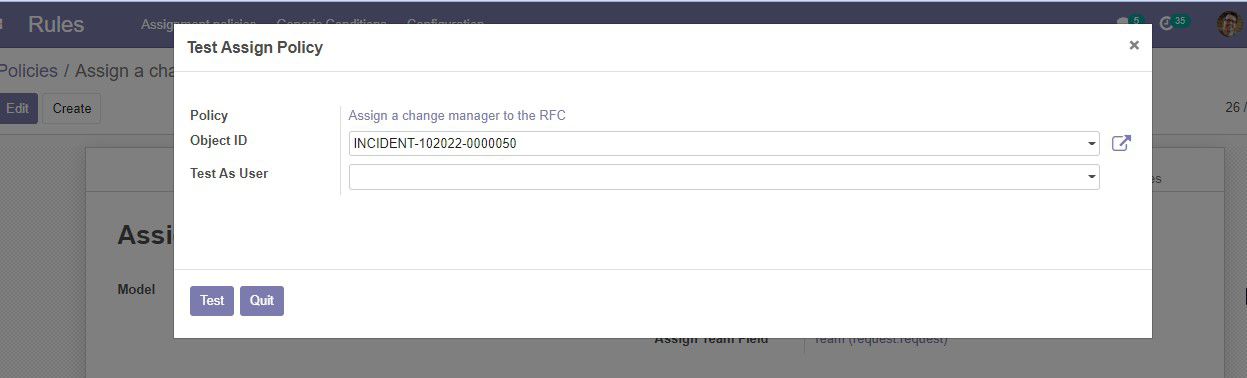
On the form that opens:
- In the Policy field, select the created assignment policy (we select - Assign a change manager for the RFC ).
- In the Object ID field, select the object on which to test the policy. In our case this is a request that was created by the administrator.
- Click Test.
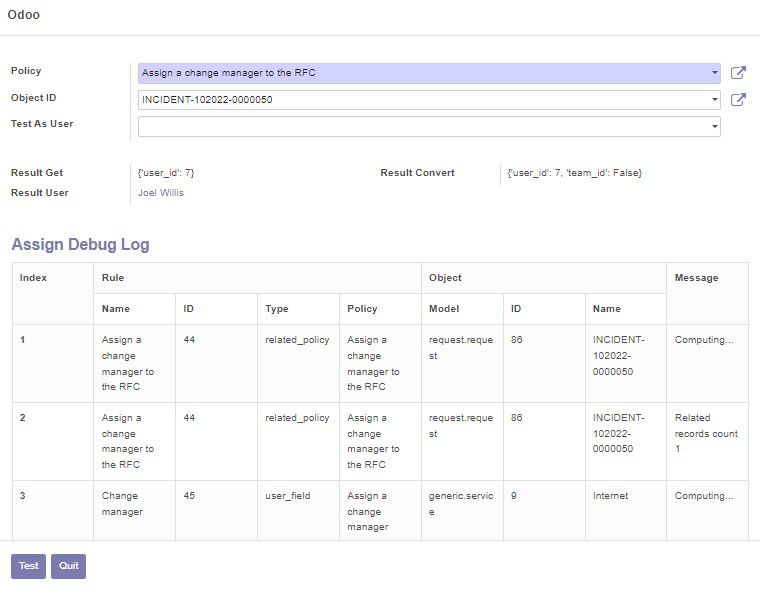
At the bottom of the window, you can see the overall result of testing (the Result Get and Result Convert fields). The result is returned as a dictionary (from python programming language).
Below you can see an Assign Debug Log. It displays the result of testing each rule of each policy step by step.
Set up automatic assignment.
Now let's set up the automatic assignment of the change manager for the Request for Change.
Make sure that the following module is installed:
- Generic Request (Actions) - this module allows to perform automatic actions when the request navigate along the route.
Click Requests in the main menu on the left. Then click Configuration -> Types.
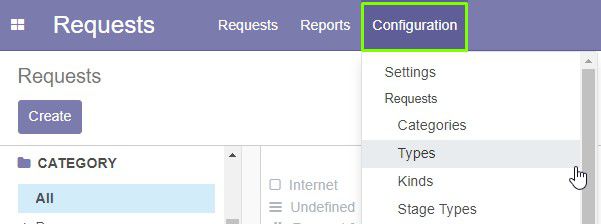
Select the type of request where you want to set up automatic assignment.
On the request type form, click Actions.
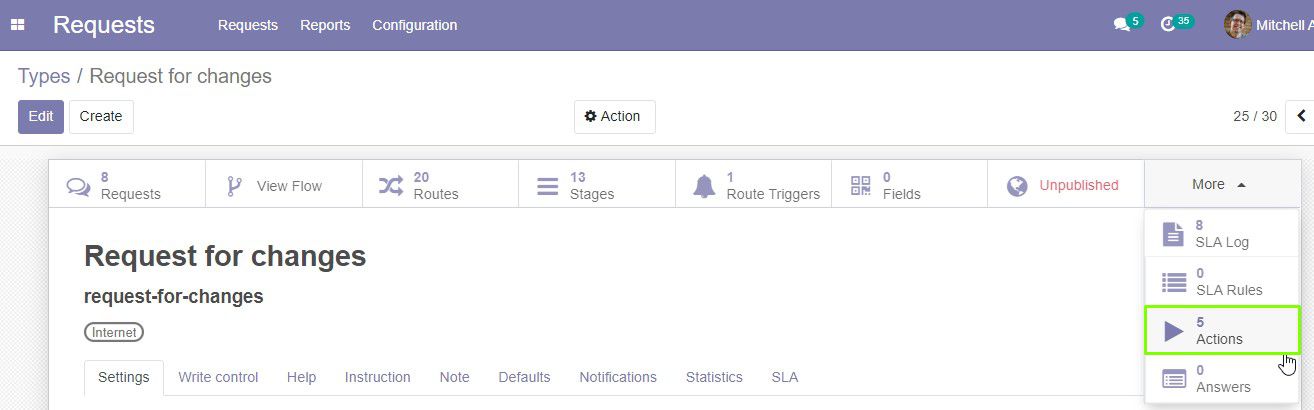
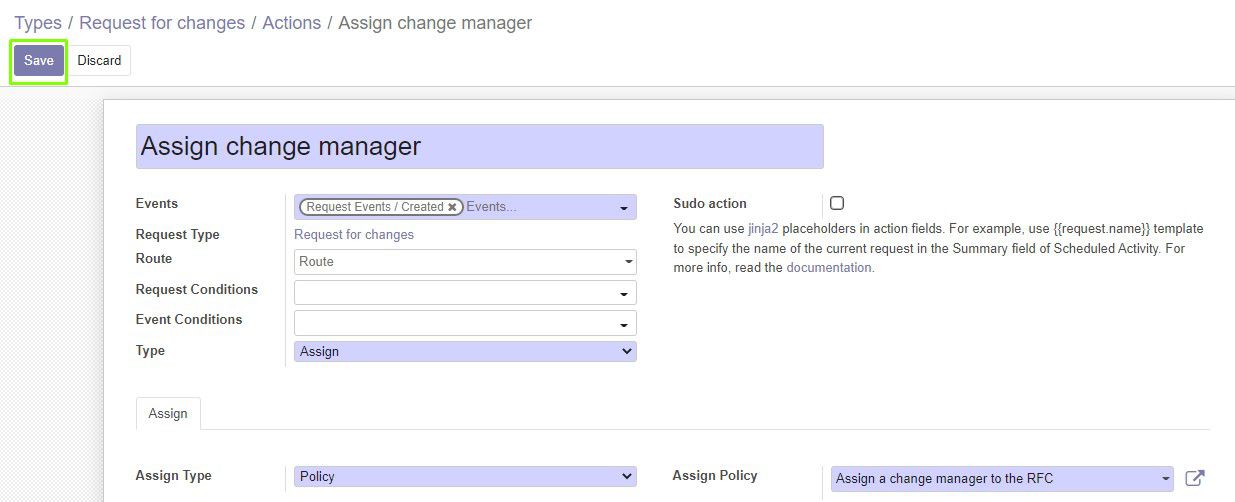
On the actions page, click Create and fill out the form:
- Enter the action name.
- Select the type of action - Assignment.
- Click the Assign tab, select the Policy Assign Type. Next to the Assign policy field select the created assignment policy.
- Click Save.
Now when the automatic assignment is configured, the change manager will be immediately assigned for the Request for Changes.