The Generic Request Mail module, developed by the Center of Research & Development, provides several useful features to simplify the process of handling requests received through email. With this module, you can automatically create requests from incoming emails or manually create requests by clicking an icon within the email. Additionally, the module includes the ability to configure "canned responses," which are short words or phrases that can be substituted with pre-configured text.
Automatically Creating Requests from Emails
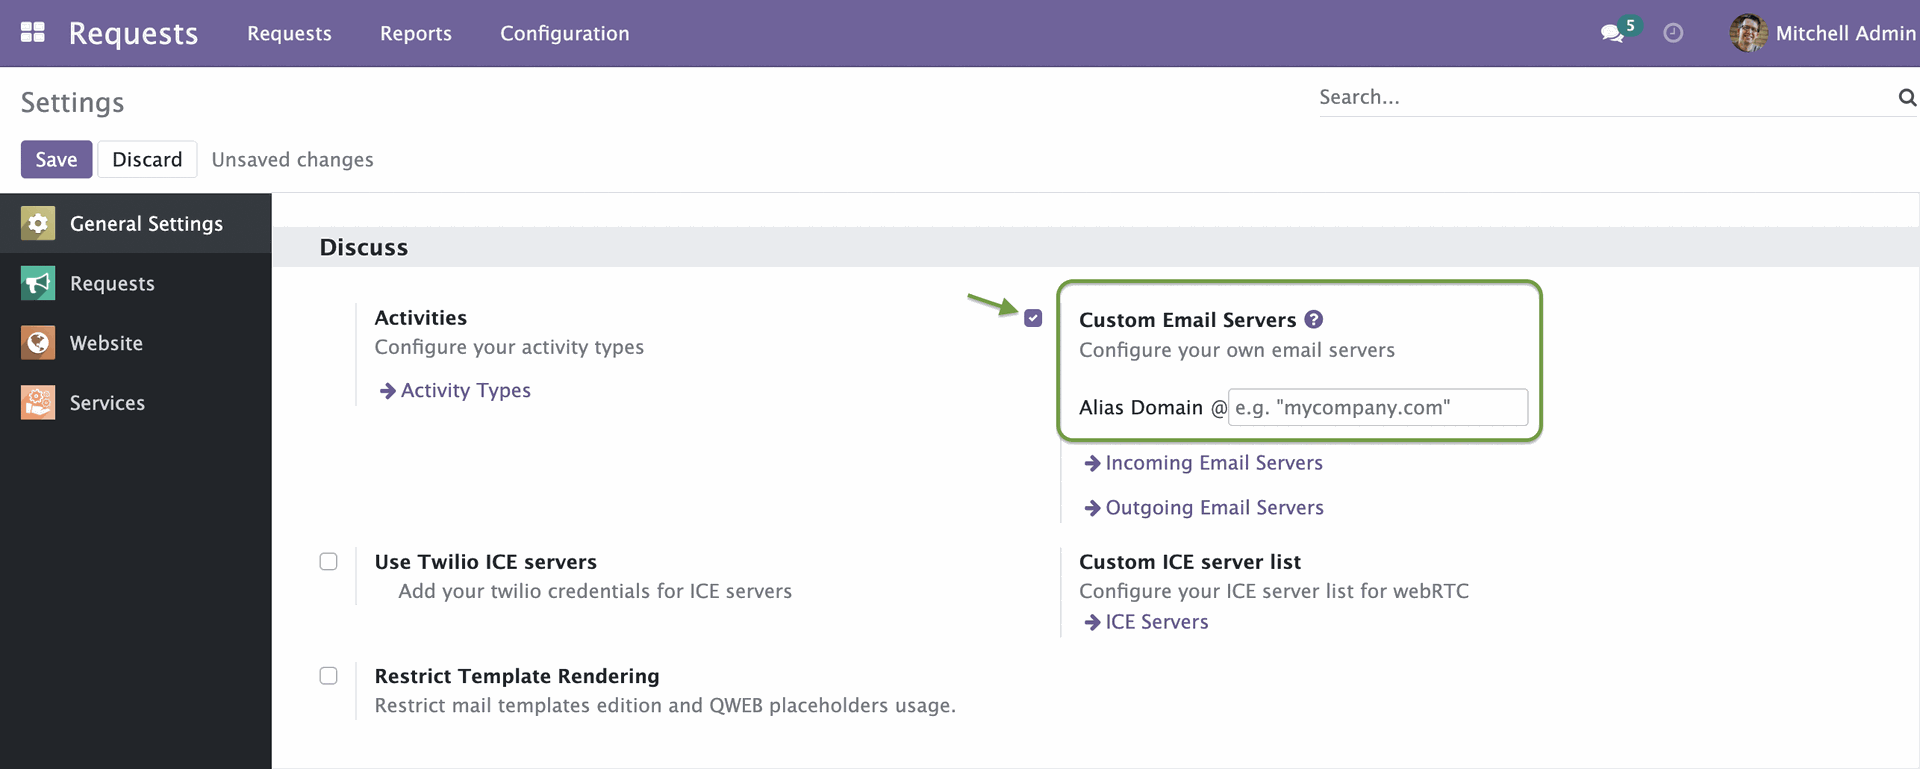
To enable the configuration of email aliases in requests and automatically create requests from desired email addresses, you must first enable the Custom Email Servers option within the General Settings. This can be done by navigating to Settings -> General Settings and selecting the Custom Email Servers checkbox. This will allow you to use your own email server. This server must be pre-configured.
To create a new Mail Source in the Requests app, follow these steps:
- Open the Requests app and navigate to the Configuration menu.
- Click on "Mail Sources".
- Click the "Create" button to begin creating a new Mail Source.

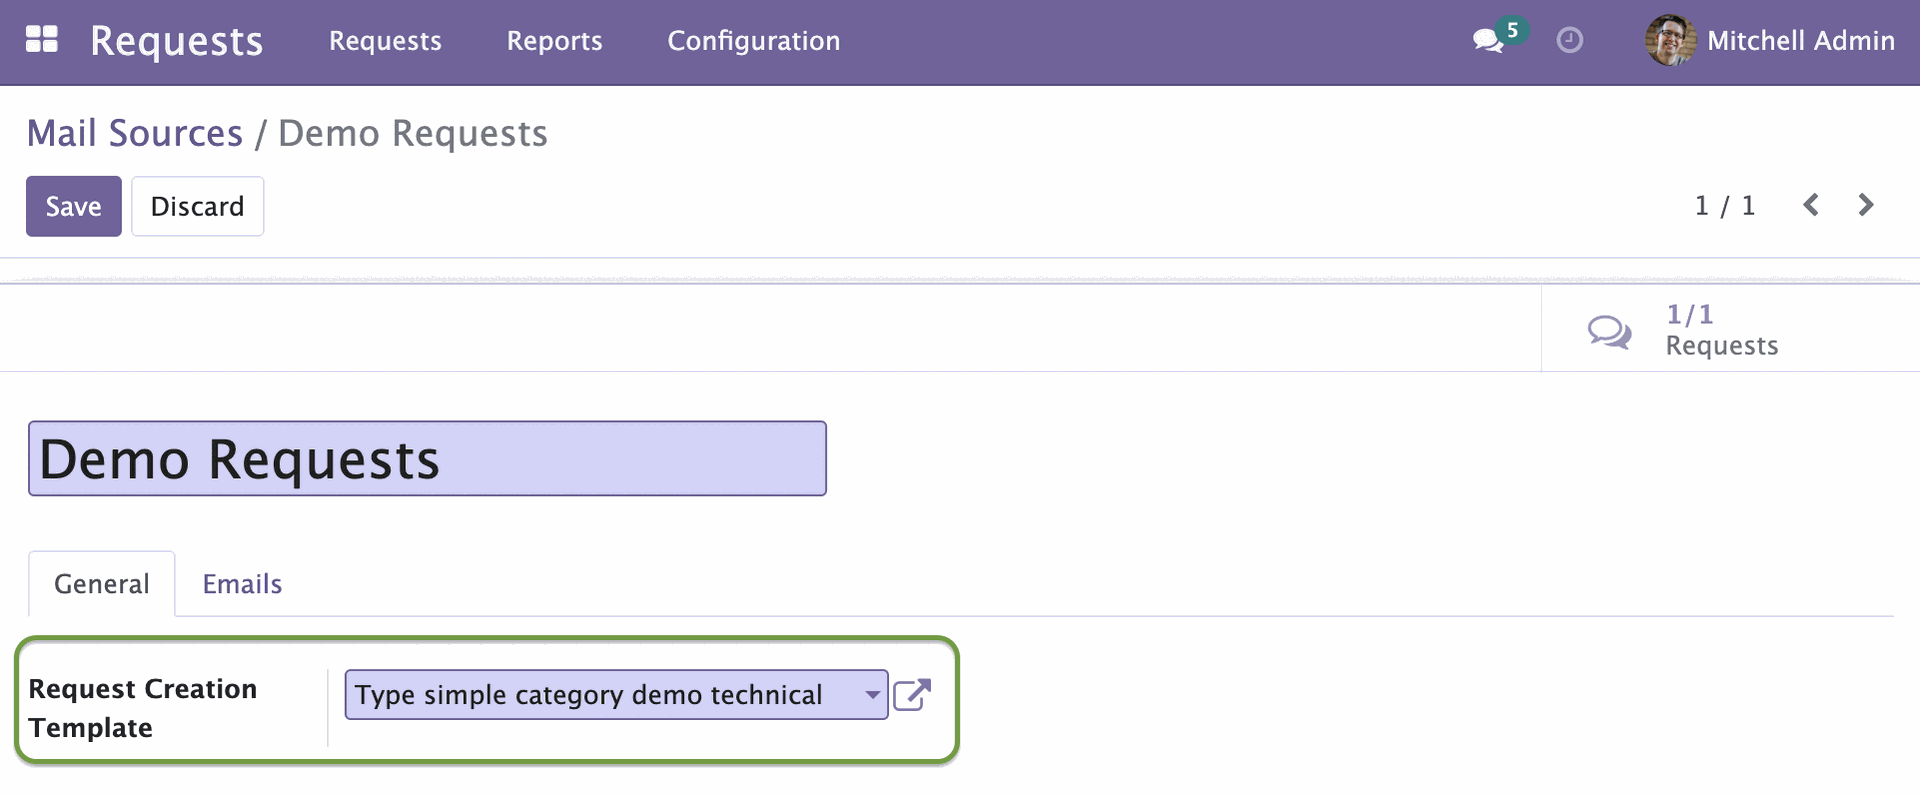
In the form, enter the Name of the Mail Source in the upper field. On the General Tab, choose the Request Creation Template.
To create a request creation template that specifies the parameters for incoming emails, follow these steps:
- Go to the Configuration menu and select "Request creation template".
- Click on the "Create" button.
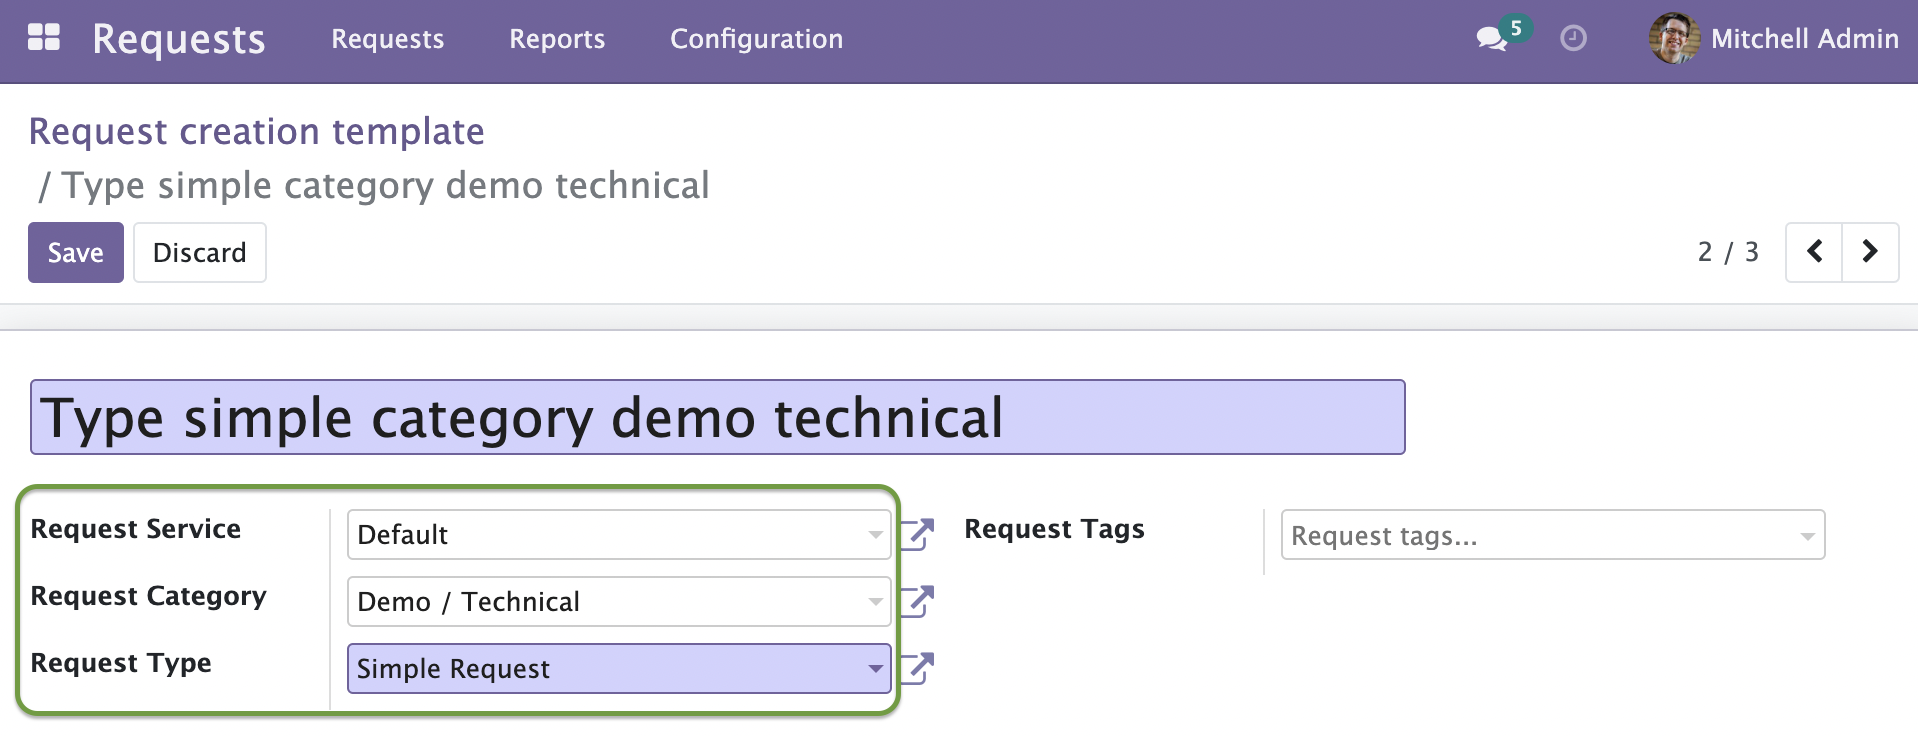
- Name the template and select the appropriate parameters, such as the Request Type, Category, Service, and Tags.
- Save the template.
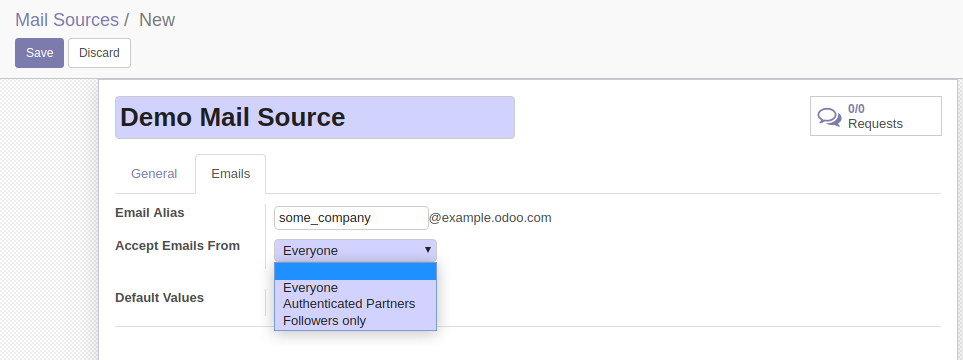
Next, click the Emails tab. Here you can setup Email Alias. For example, enter 'some_company', if you want to catch emails from some_company@example.odoo.com.

In the Accept Emails From field, select the email policy:
- Everyone - everyone can post
- Authenticated Partners - only authenticated partners
- Followers only - only followers of the related document or members of the following channels
Default Values is a Python dictionary with default values for creating new records. It will be filled in automatically.
Save the form.
Now incoming emails from the configured email aliases will create requests with provided parameters.
Create Requests Manually from Incoming Emails
You can create requests manually by clicking the Create Request  icon next to the email header.
Open Discuss -> Inbox to see the incoming emails. Hover over an email and you'll be able to see the Create Request icon.
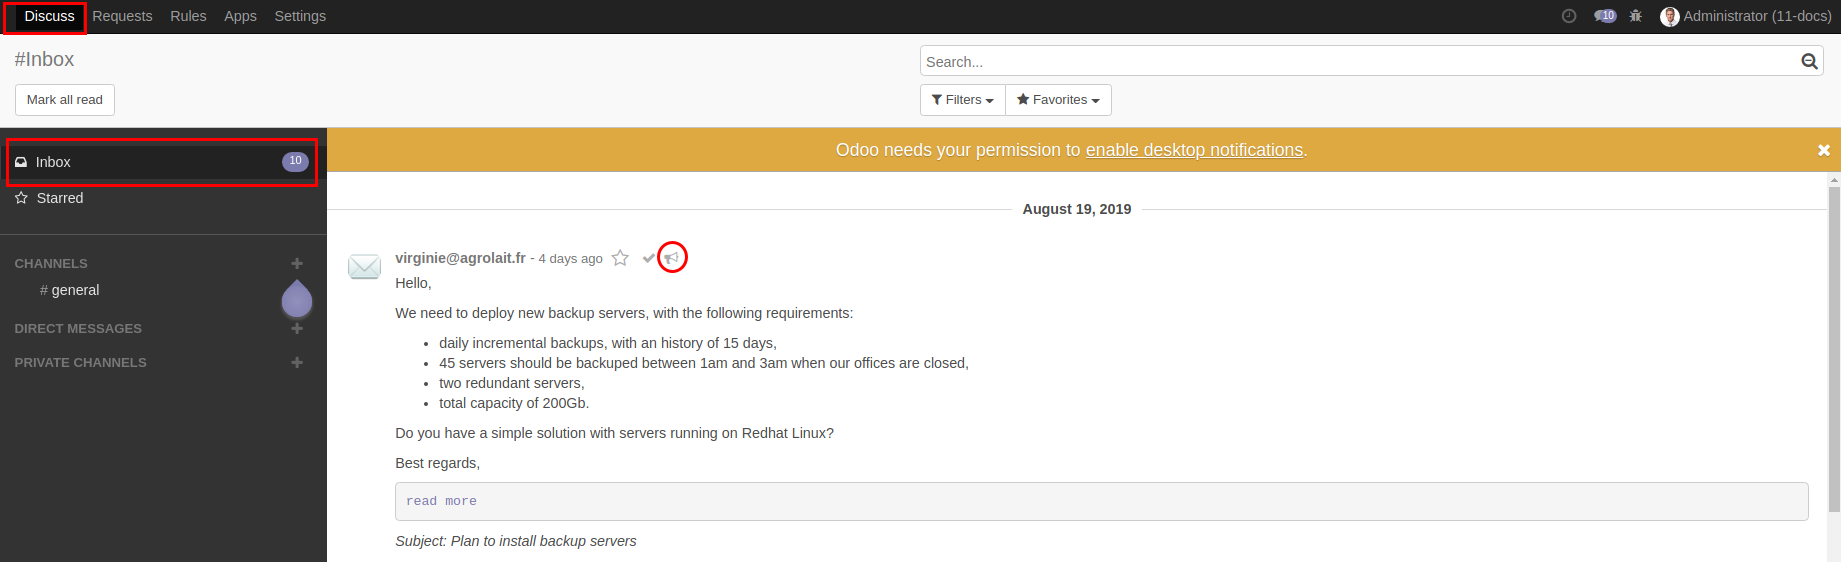
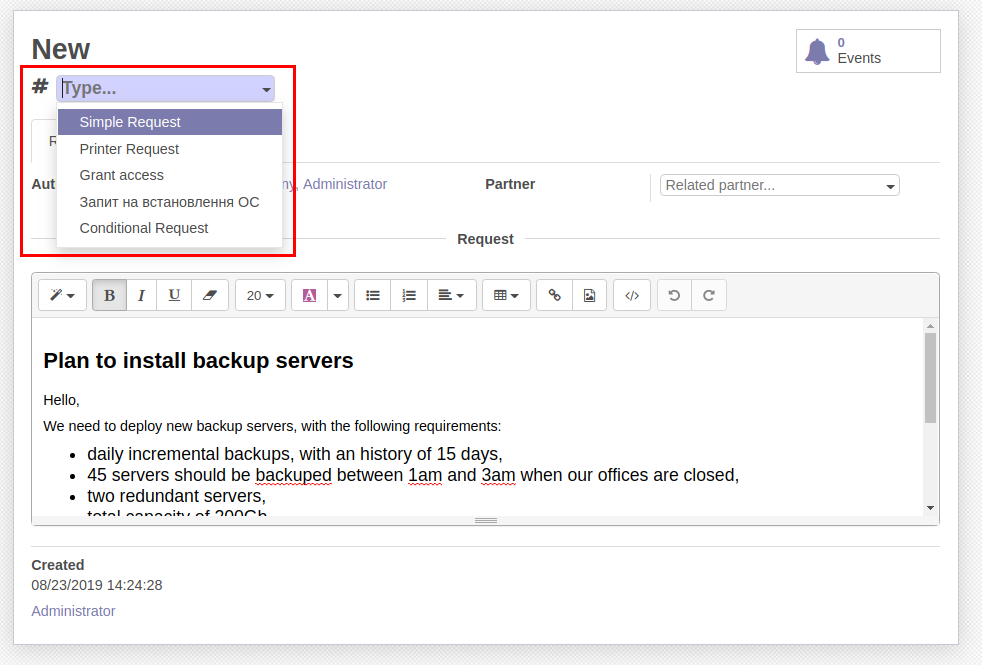
Clicking the icon opens the form for creating a request. An email body will be automatically inserted as a request text.
To create a request, you need to select the request Type in the appropriate field and click Save at the top-left corner. You can also select request category and edit request text or any other required fields.
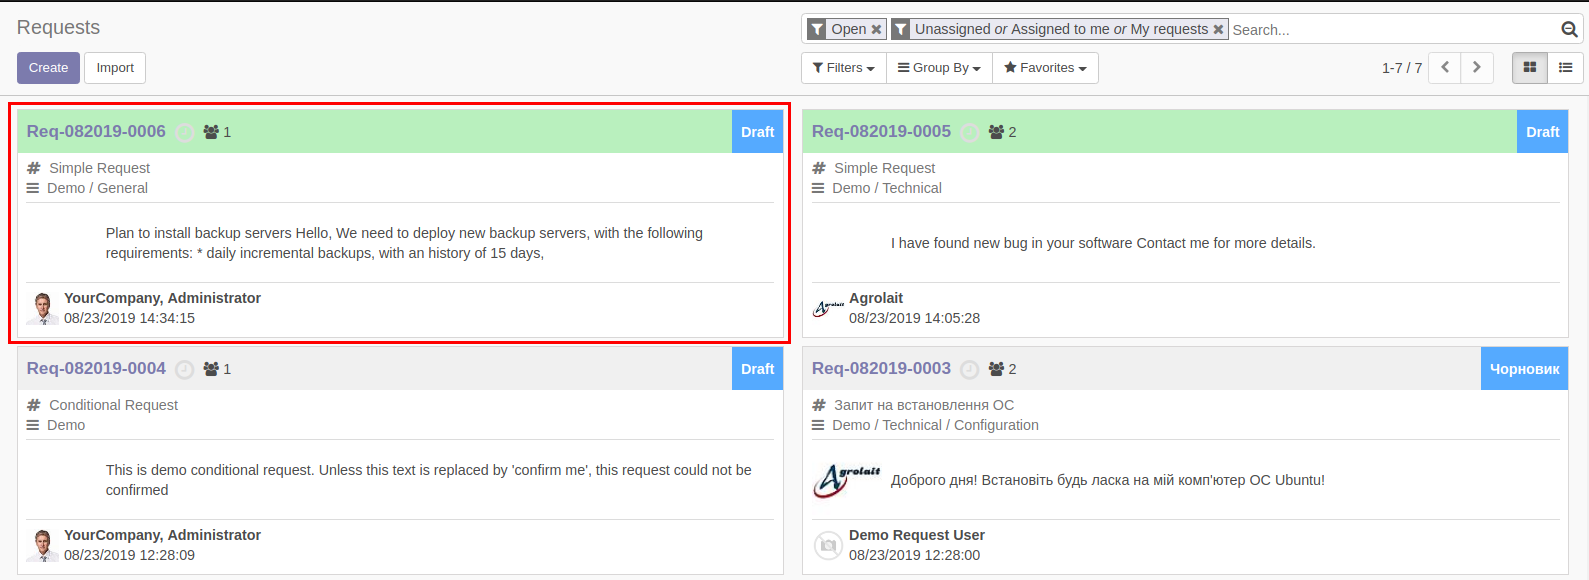
After saving, request will be created and can be processed. You can see it in the list or kanban along with other requests.
Canned Responses
You can setup canned responses that will be used in chatters and messages. You need to configure special keywords, and when you type these keyword, they can be automatically substituted with prepared text.
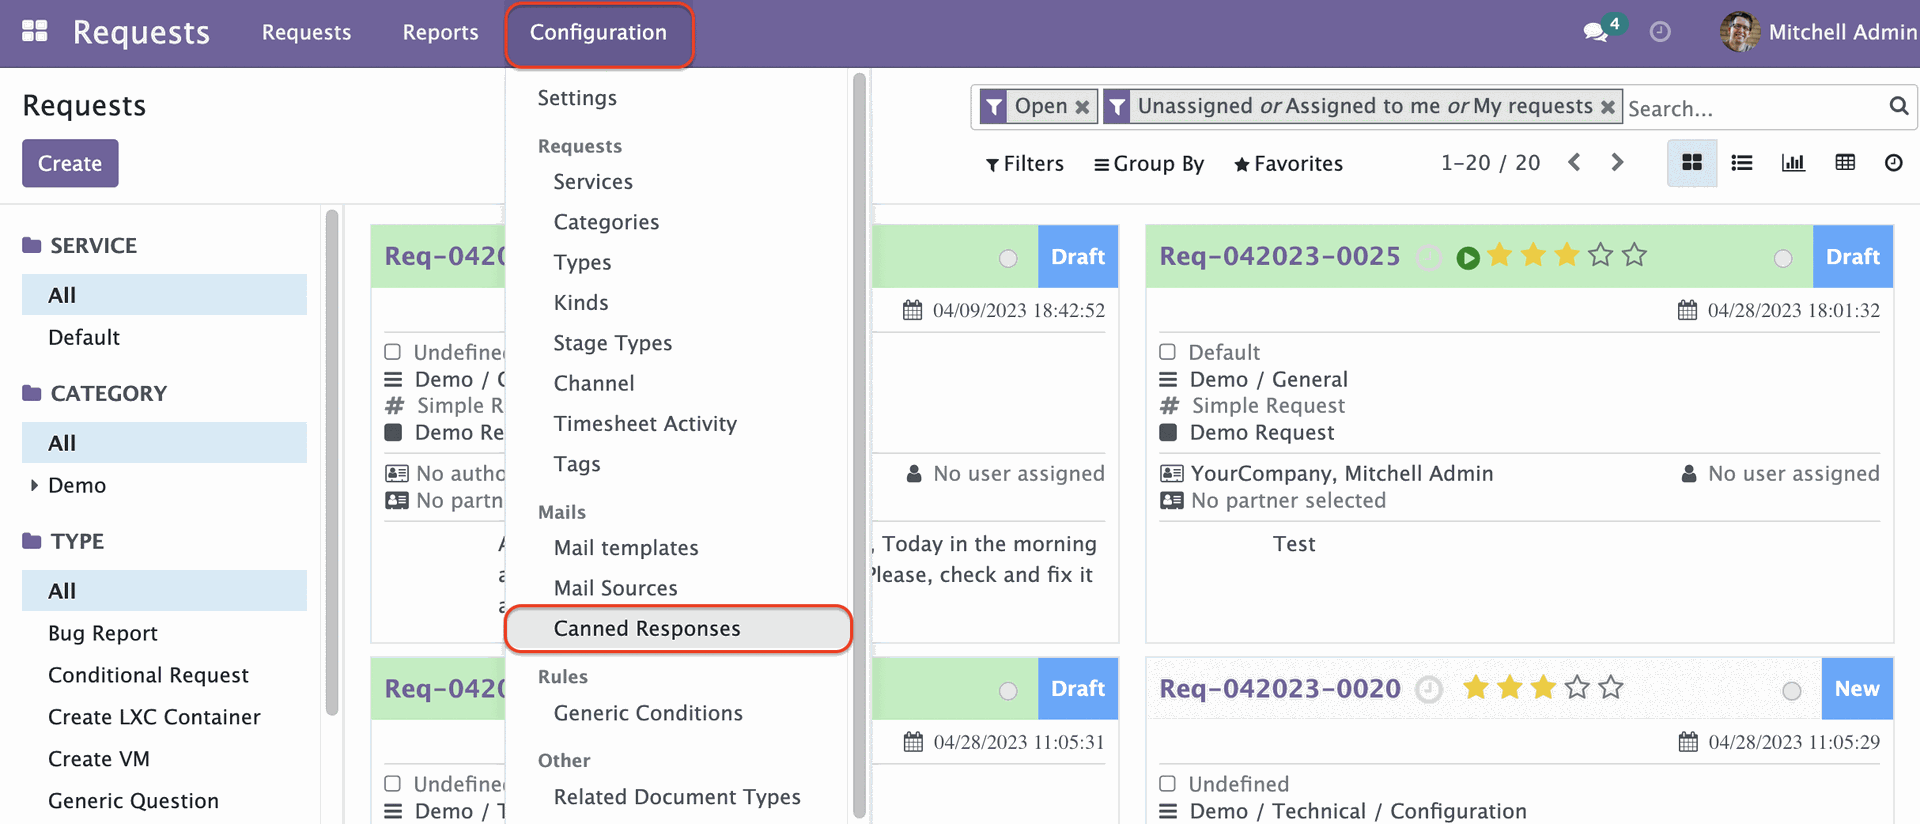
To configure keywords, in the Requests app, click Canned Responses under Configuration menu.
The page of Canned responses opens. Click Create to configure special keywords.

- Under the Shortcut column, specify the keyword. When typing this keyword in chatter or messages preceding the colon, it will be automatically substituted with the configured text.
- Under the Substitution column, enter the desired substitution text for current keyword.
- Click Save.

You can configure as many shortcuts as you want.
After configuring keywords, you can use canned responses after reloading the page.
In the chatter or messages, you can type one of keywords preceding with the colon ":". You will be able to substitute it with the configured text.
You can type only colon ":" and you will see all available substitutions.
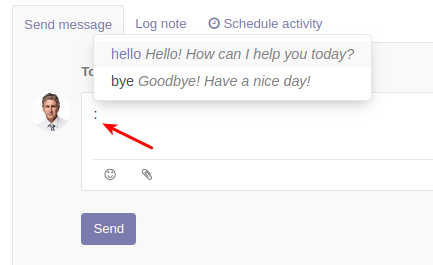
If you begin to type a word, the system will show you the only options that starts with the typed letters.
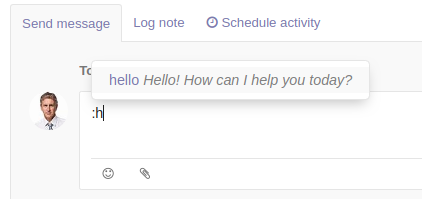
To insert the substitution, you can select it using mouse or keyboard arrows. Pressing Enter will automatically substitute selected option.