Request for Changes (RFC)
Request for Changes (RFC) is a formal request for the implementation of Changes. It controls the lifecycle of all changes and contains all information required to approve a Change.
Request for Changes is a way to bring beneficial changes to your company with minimum disruption to IT services.
In this article, we will set up Request for Changes in our Bureaucrat system. Needs to admit that in general, Request for Changes covers complex processes, so we will do our configurations in small steps for a better understanding of what's happening and what needs to be done at one stage or another. The configuration used is an example and can be modified to suit your company's needs.
Basic Workflow
The basic workflow ensures you record, assess, approve, and implement changes. The lifecycle of all Changes is controlled by the Change Manager. For important Changes, the Change Manager will refer the authorization to the Change Advisory Board (CAB). Emergency Change Advisory Board will be responsible for assessment and implementation of emergency changes.
We start to configure RFC by creating a new type of request. Open the Requests applications, click Requests -> Types, and then click Create to create a new type of request.
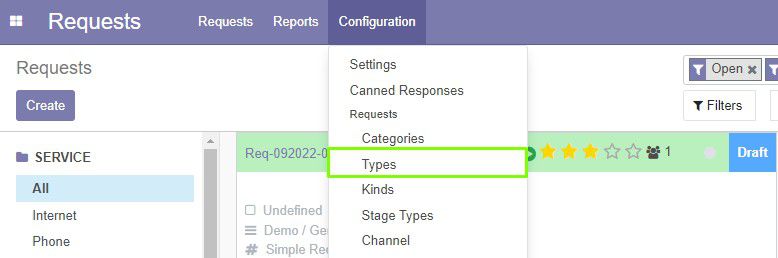
On the form, enter the name of the request type.
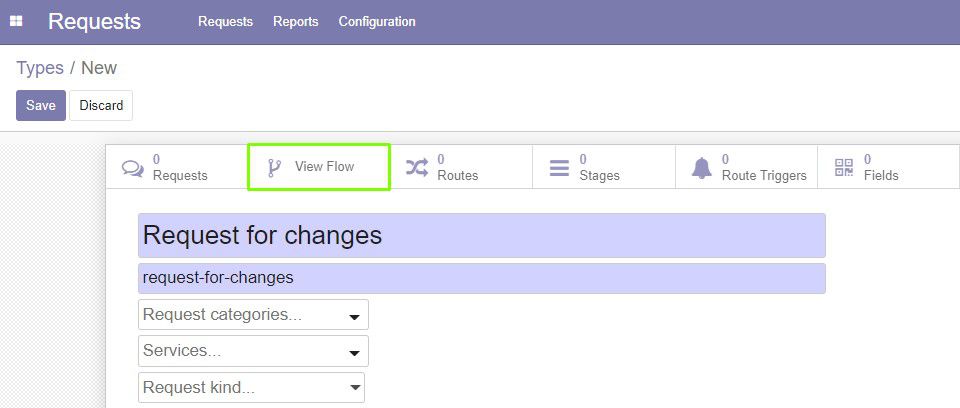
We will set up request stages and routes using the Diagram View. This is one of the cool features of our platform which makes it easy to plan workflow of the request on the fly.
Click View Flow, the diagram view opens.
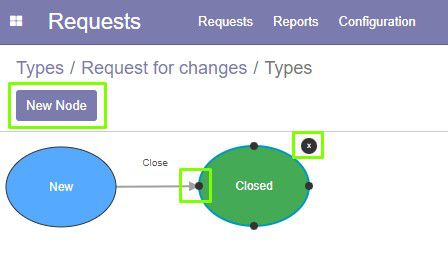
Ellipses represent request stages and connections are the routes. We can create new stages by clicking New Node. Stages can be click-and-dragged in any position. To create a route, we select the initial stage, then click one of the contact points and drag it to the desired stage. We can delete stages and routes by selecting them and clicking the close icon.
More information on how to create stages and routes on the Diagram View is presented in our recent article.
So, we start to build the workflow of the Request for Changes.
Click New Node to create a new stage.
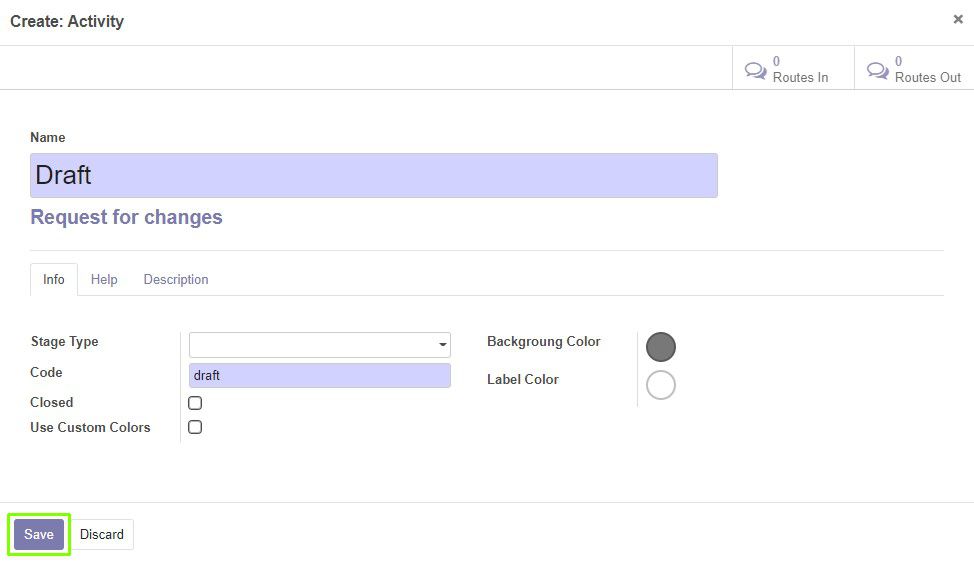
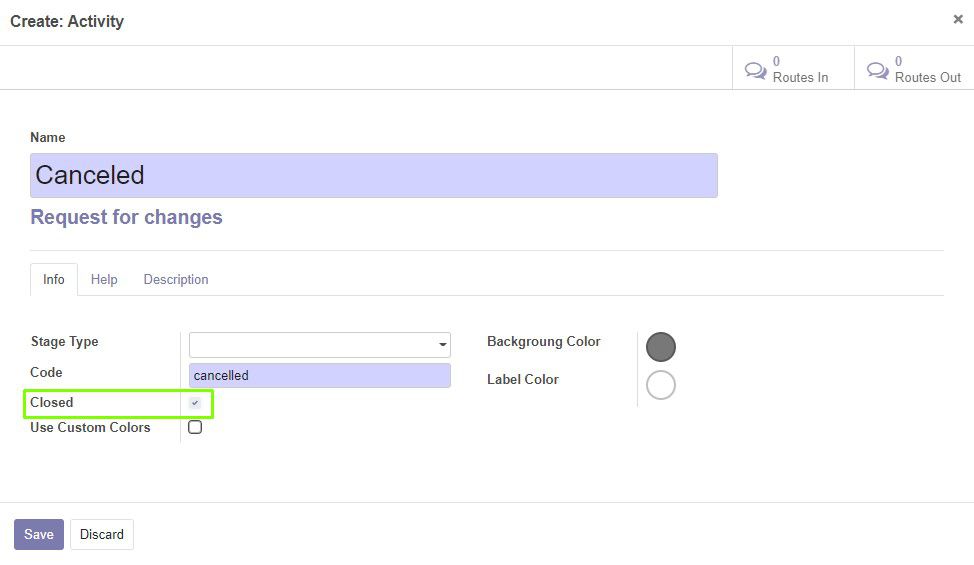
Every request at the initial stage will fall into Draft. The Name is the only required field for creating a stage. The Code will be filled in automatically.
From the Draft Stage, request can be canceled or go to approvement. Let's the same way create the Canceled and On Approve stages. After canceling the request, it will be closed. So we need to select the Closed checkbox.
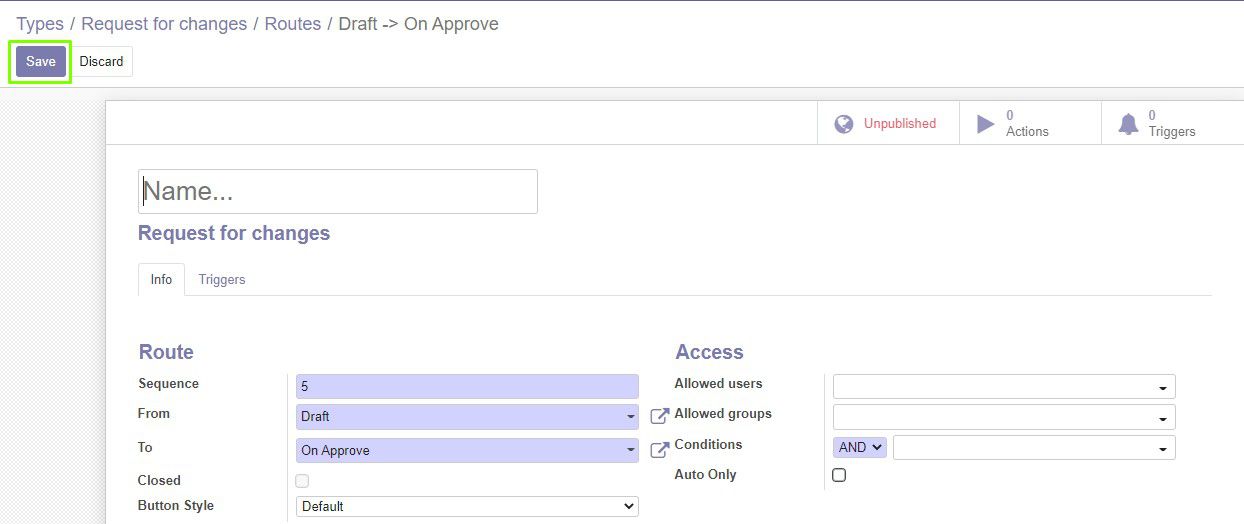
Now, let's connect Draft with other stages and create appropriate routes. This time, we don't even need to enter the name of the route.
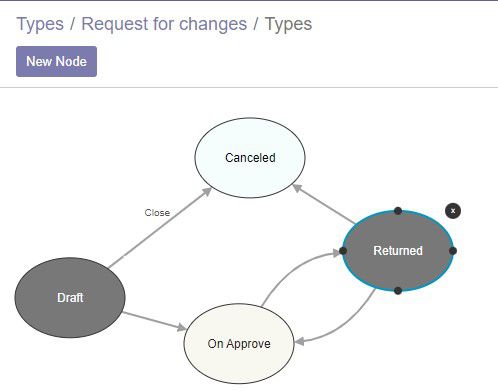
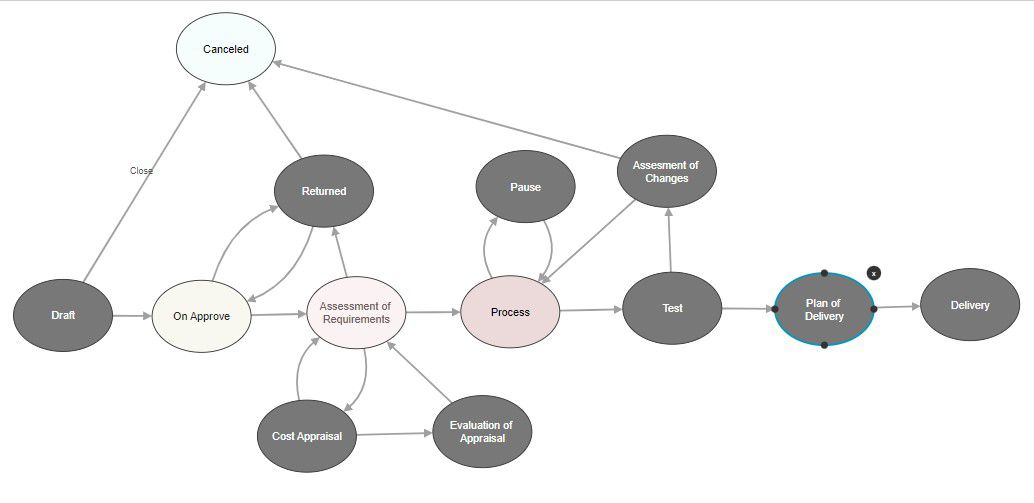
Now the workflow diagram looks like the following:

On approval, Change Manager may request additional output data. In that case, request will be returned. It can be re-sent for approvement or canceled if it does not meet the requirements.
We create the Return stage and the appropriate routes.
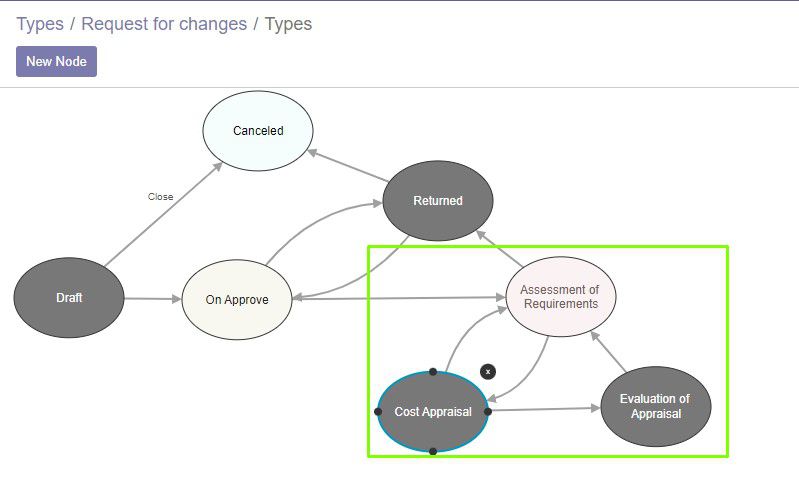
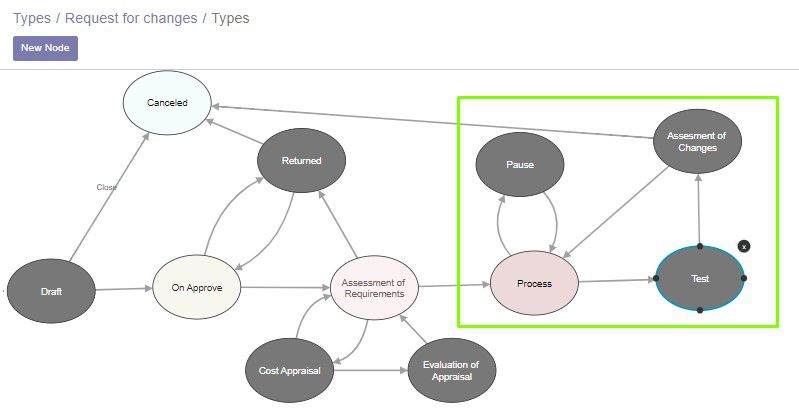
If the Changes are approved by the Change Manager, the request moves to the next stage. At this stage, Change Manager and Change Advisory Board assess requirements for this Changes. In some cases, request can be returned for the refinement.
Assessment of Requirements has a sub-process of Cost Appraisal. This appraisal can be done several times and can be re-evaluated to achieve the final result. So we create an assessment cycle with the following stages.
After the Assessments of Requirements, the process of implementation begins. It also represents a cycle. After making certain changes, the testing stage takes place. Then, an assessment of the changes made occurs. According to the results of this assessment, the request may be returned to the process for refinement, canceled or accepted to delivery. The Process can also be paused for technical, financial or other reasons.
If the changes were tested successfully, they are going to Delivery. The delivery of changes takes place in two stages - Plan of Delivery and actual Delivery. So we create another 2 stages. This will finalize our general workflow scheme for the Request for Changes.
We have completed the minimum required configuration for RFC, and it can already be used to lead changes implementation in your company.
Advanced Setup
Our system allows to greatly improve and ease request processing. For example, we can add automated actions and automated routes.
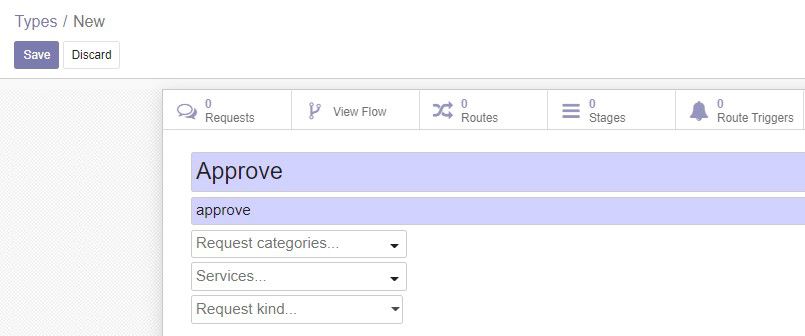
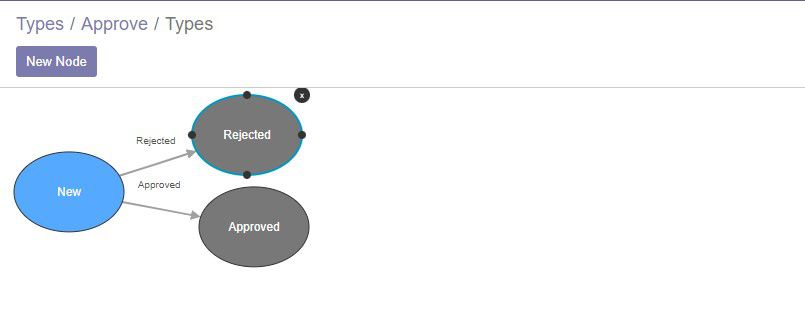
Let's review the On Approve stage. It would be convenient to separate approvement process as a new request. Thus, we create a new Approve request type with a simple workflow: Approve or Reject. And we set up RFC actions to automatically create the Approve subrequest any time request gets to the On Approve stage.
A new Approve type of request looks like this:
With a simple flow:
Automated Actions
Now we open Request for Changes and create automated actions.
Click Actions on the request type form.

Click Create to create a new action.
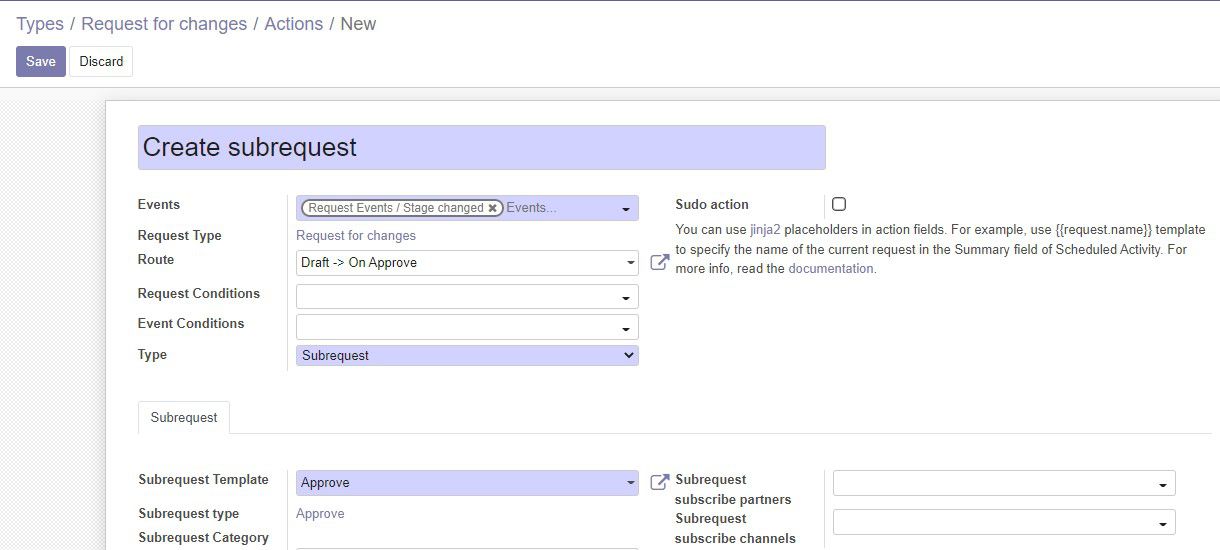
We enter the action's Name. Select event - Stage changed. The type of action is Subrequest. Below, we select the type of subrequest to be created - Approve. Thus, we automatically create the Approve subrequest when RFC moves on the route from Draft to On Approve stages.
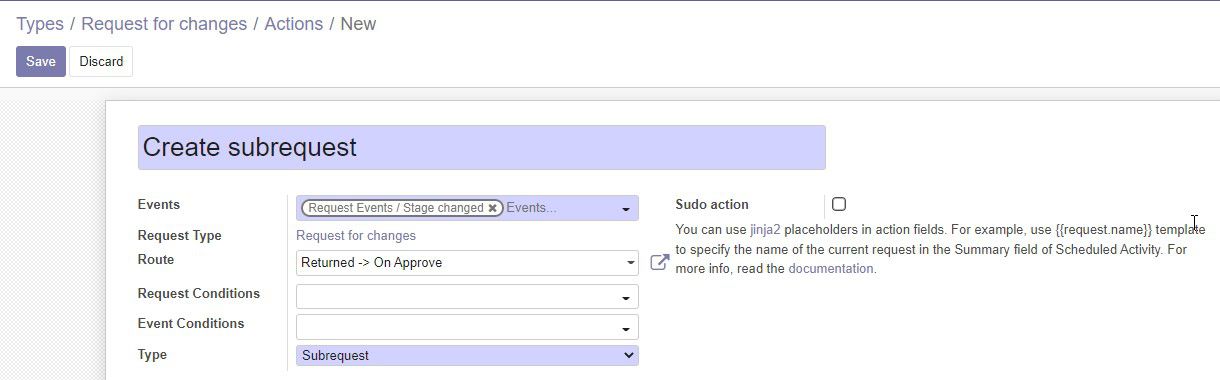
We also create the same action but on the route from Returned to On Approve.
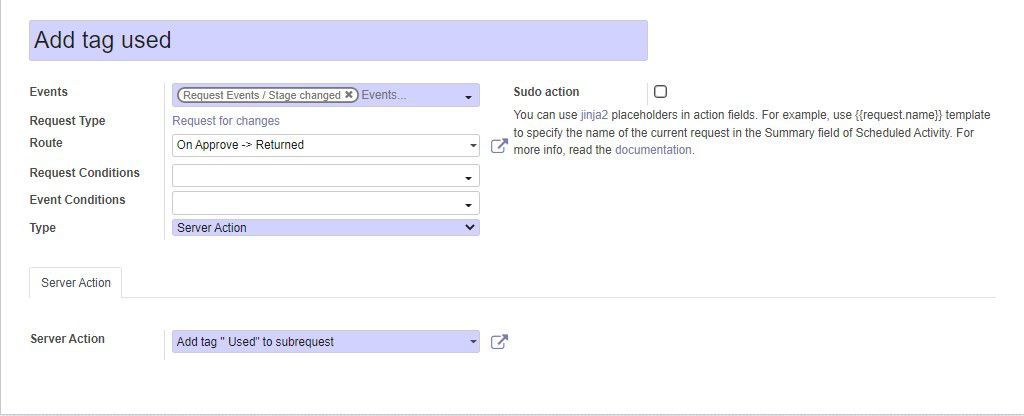
We want to create another 2 actions to mark request with the appropriate tag after approval. To apply a tag, we can use the Server Action action type. We create the first action for the On Approve -> Assessment of Requirements route.
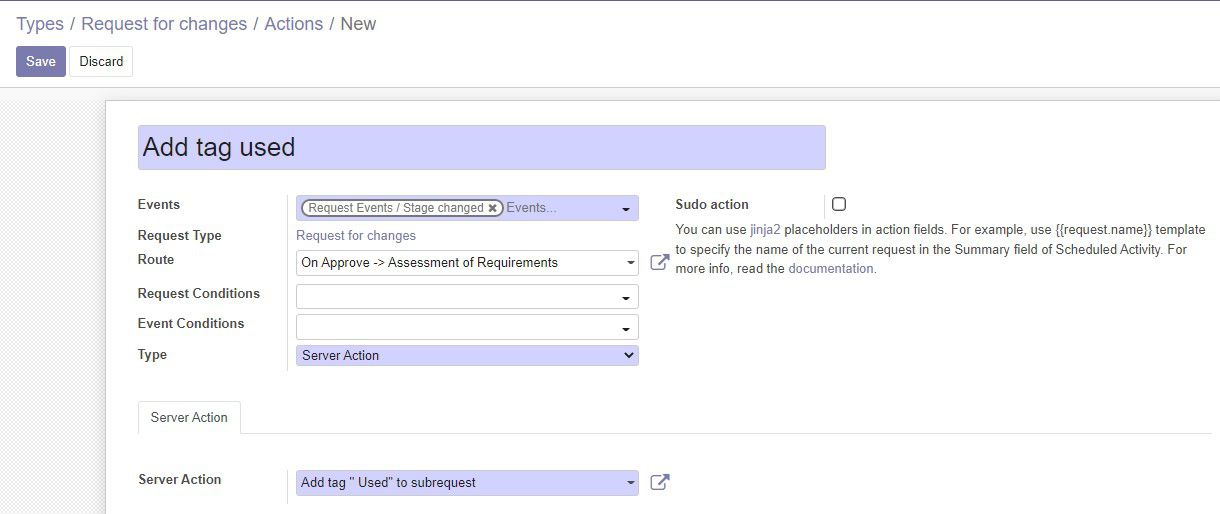
In our case, this action was pre-configured to execute a certain Python code.
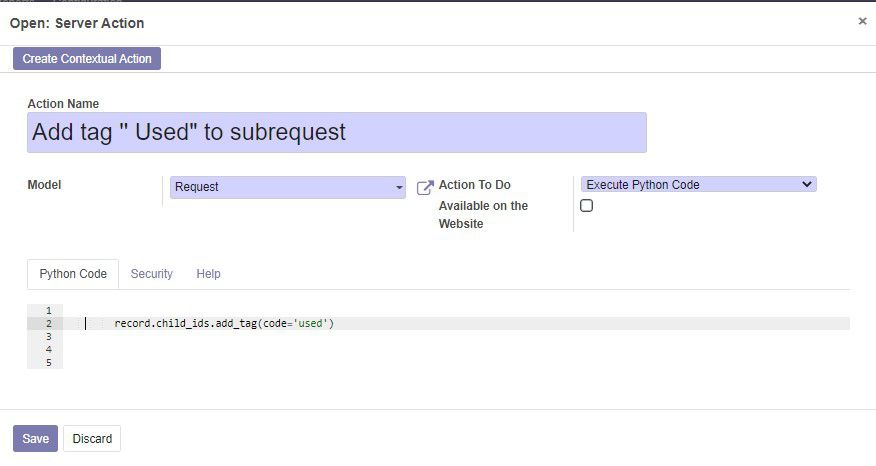
We can setup custom actions in the Settings ->Technical -> Actions -> Server Actions.
Now we create the same action, but for the On Approve -> Returned route.
For more information on auto-actions, see the Documentation.
Automated Routes
To complete set up the approval process, we can also make triggers to automatically move approved requests to the assessment stage or return them in case of rejection.
To create a trigger, we need to open the required route and click Triggers on the form.
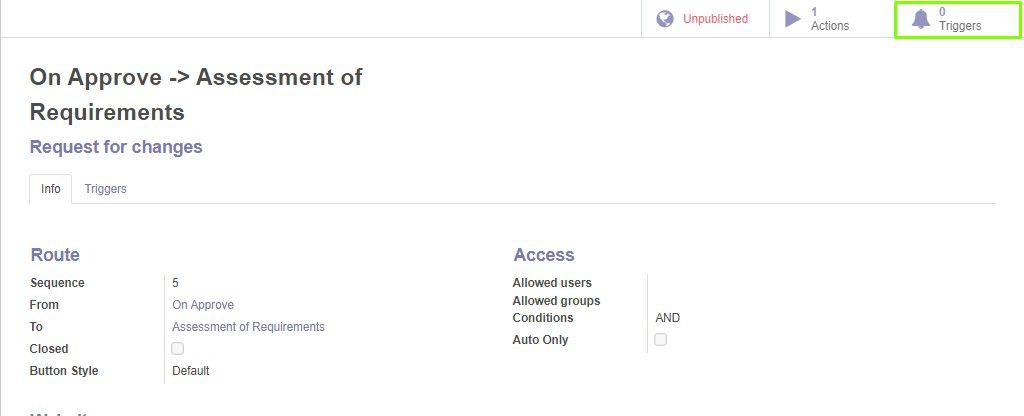
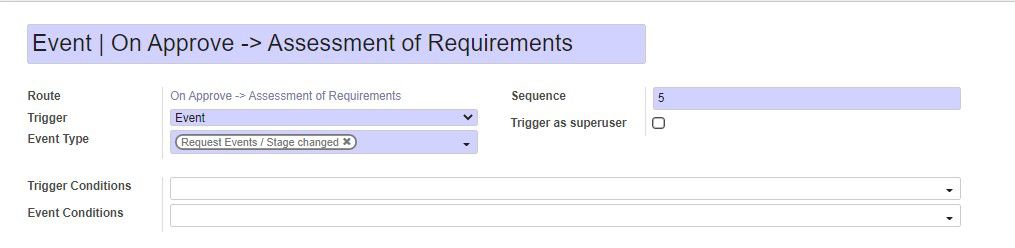
We open the On Approve -> Assessment of Requirements route and create a trigger. It moves request when it's subrequest is moved and trigger conditions are fulfilled.
We also use custom condition for this trigger. It based on related conditions and checks if the subrequest of the current request is closed (positively) and has the "Used" tag simultaneously.
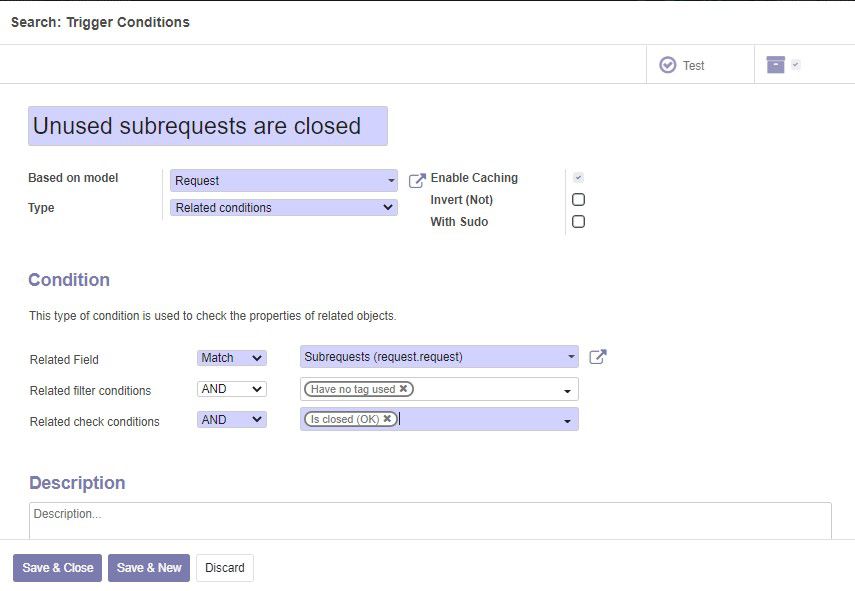
Custom conditions can be configured from the Rules -> Generic Conditions menu. More information on conditions - in the Documentation.
We create the second trigger on the On approve -> Returned route. this trigger automatically moves requests by the current route if subrequest is negatively closed (rejected) and has the "Used" tag.

For more information on automated routes, see the Documentation.
Project Integration
Now we have configured Request for Changes with basic workflow and partial automation. For further improvement we can set up integration with the Project to be able to automatically create tasks, for example, on the Progress stage, and to have the ability to automatically move requests when all tasks are done.
More information on how to do it can be read in this Guide.